

Before you start
- Confirm you are on the right job before editing or creating documents.
- Do not save, edit, invoice, or add visits when you are only reviewing.
- Use real US-market service names such as roofing, gutters, HVAC, or exterior painting.
1. Open new job
- Go to Jobs.
- Click Create job.
- Confirm that you need a direct job.
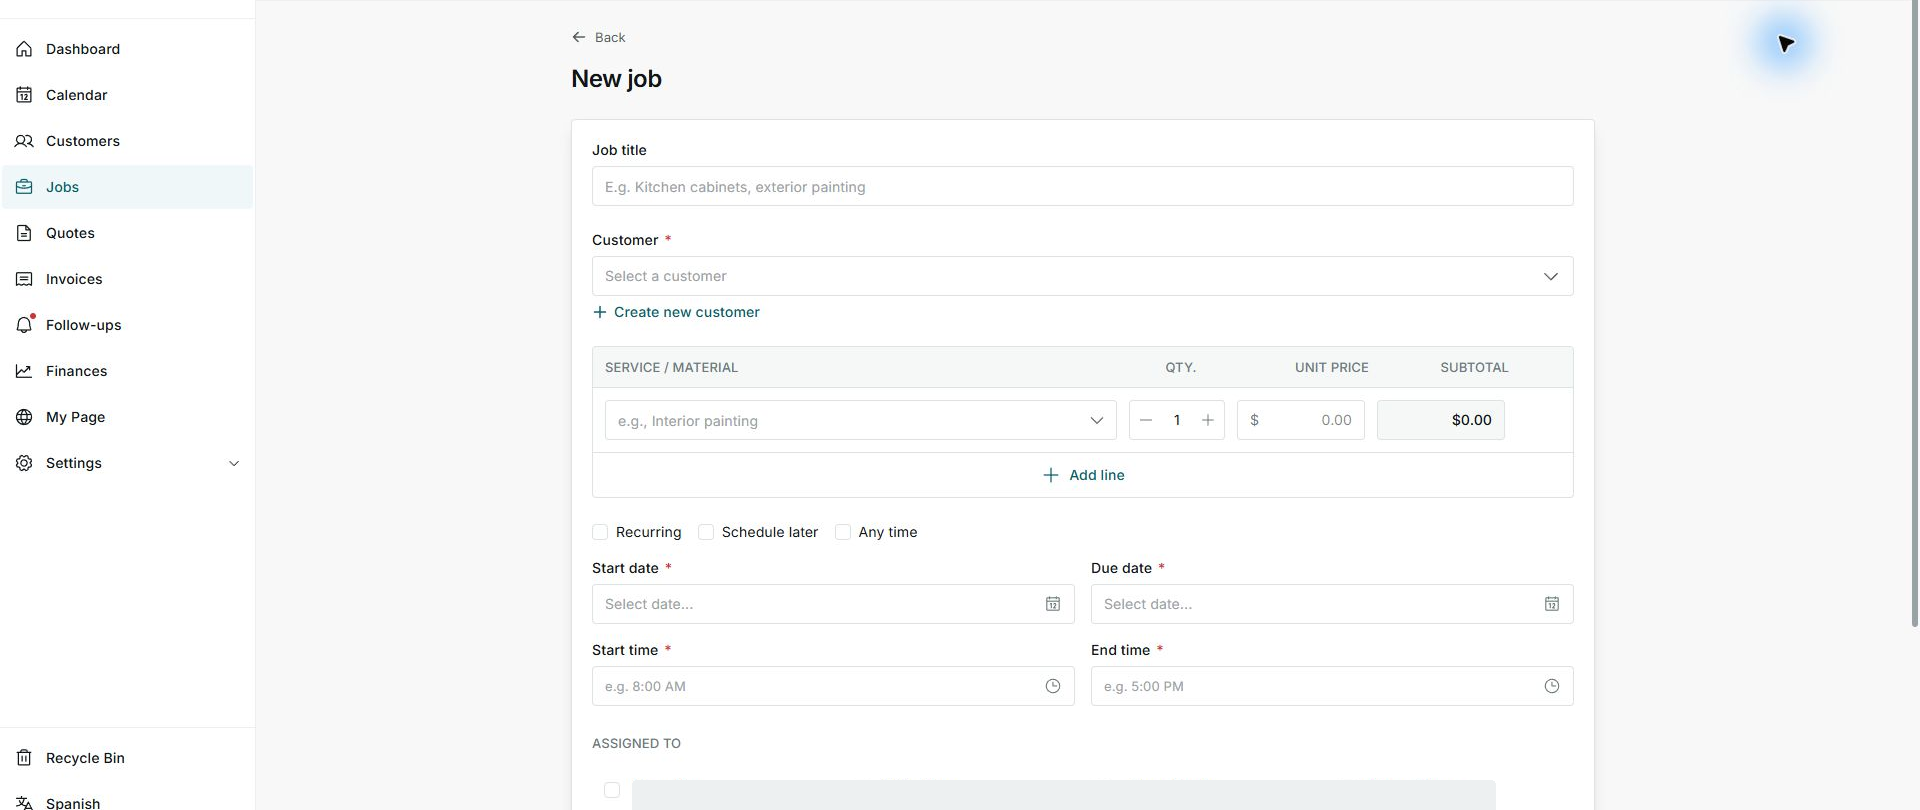
2. Complete main details
- Add job title and customer.
- Add service or material, quantity, and unit price.
- Use real US-market service names such as roofing, gutters, HVAC, or exterior painting.
3. Schedule and assign
- Set start date and due date.
- Use Schedule later if you do not have the date yet.
- Assign members only when you know who will do the work.
Statuses and options you may see
- Schedule later
Meaning: Allows keeping the job without a date yet.
Next step: Use it when the schedule is not final.
- Any time
Meaning: Marks a visit without exact time.
Next step: Use it for flexible work.
- Assigned to
Meaning: Defines who will do the work.
Next step: Select members before saving if you already know the team.
- Save
Meaning: Creates the job.
Next step: Do not click it until details, pricing, and dates are reviewed.