

Before you start
- Have the job ready for the site visit.
- Confirm whether the team needs an exact time or can go any time during the day.
- Prepare useful instructions, such as equipment, site access, or customer notes.
- Create visit puts the real visit on the calendar; review the details before using it.
1. Open New > Visit
- Go to Calendar.
- Click New.
- Choose Visit to schedule another site visit for an existing job.
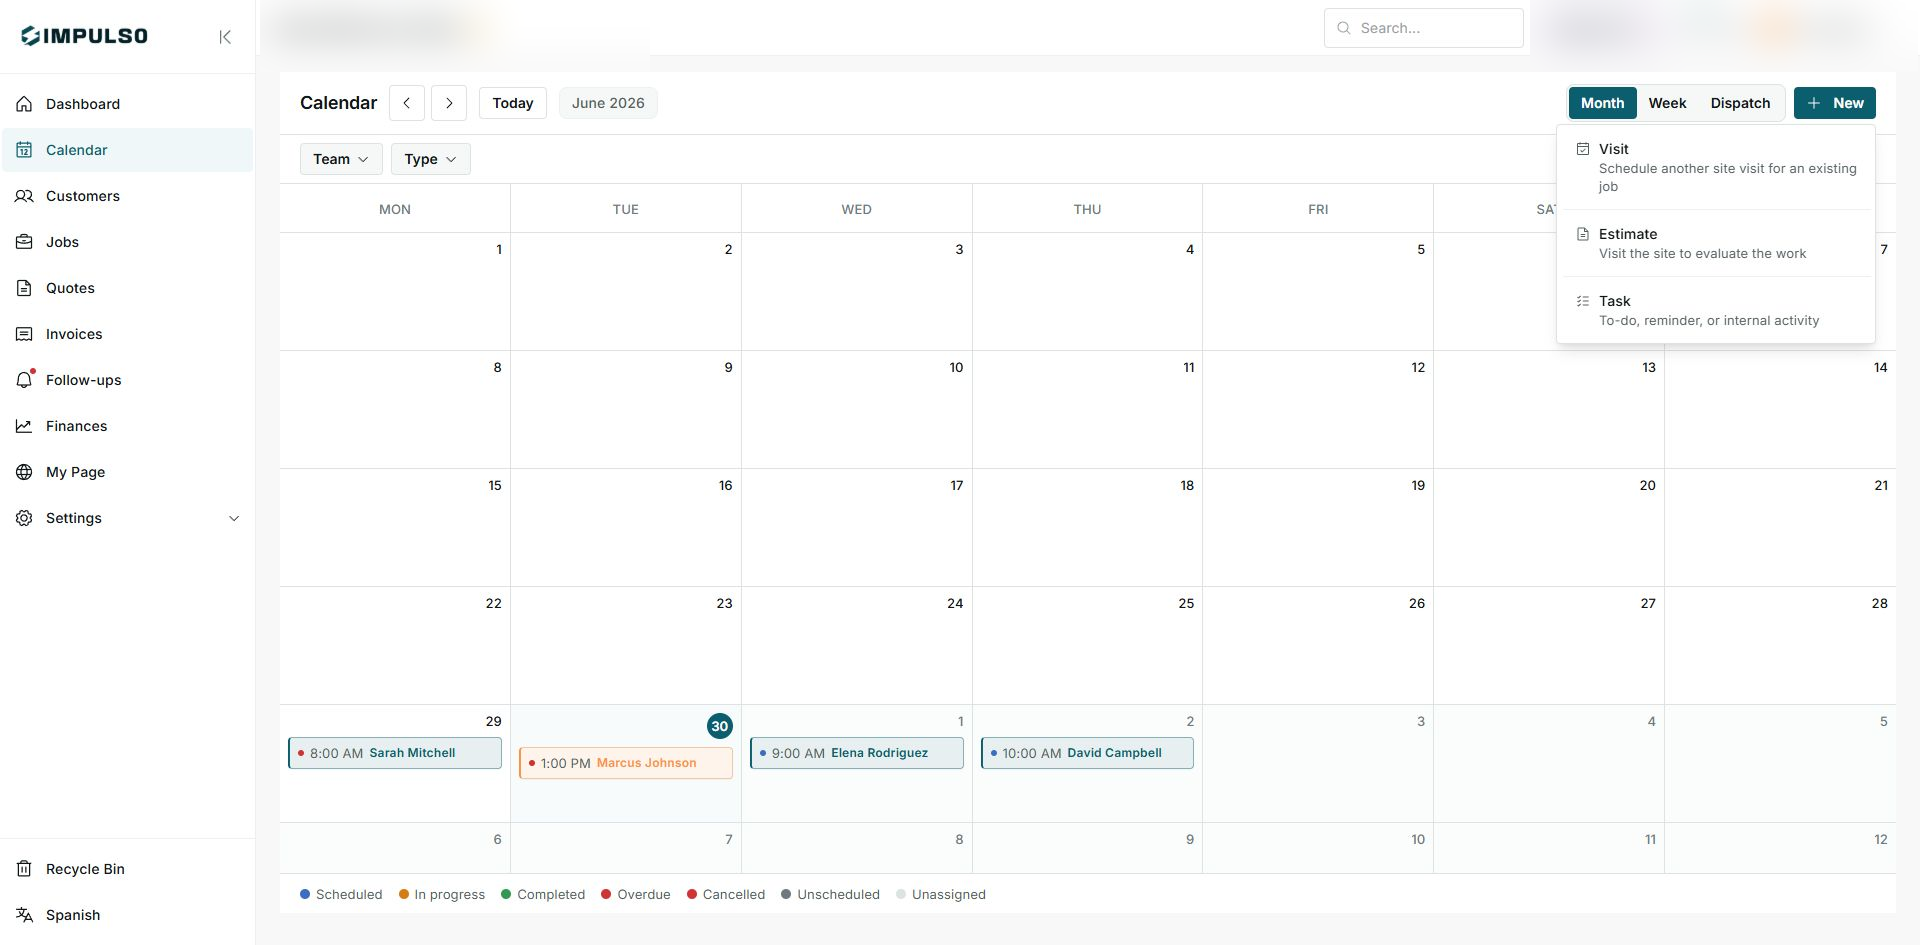
Use Visit when the job already exists and you need to add a site visit to the calendar.
2. Select the job
- In Job, open the selector.
- Search for or select the correct customer job.
- Check that the service name, customer, and job number match the work you plan to visit.
3. Set the date and time
- Confirm the Date.
- Choose Time and End time when the visit has an exact window.
- Use Any time only when the team can complete the visit during the day without a fixed hour.
- Use Schedule later if you do not have a final date yet.
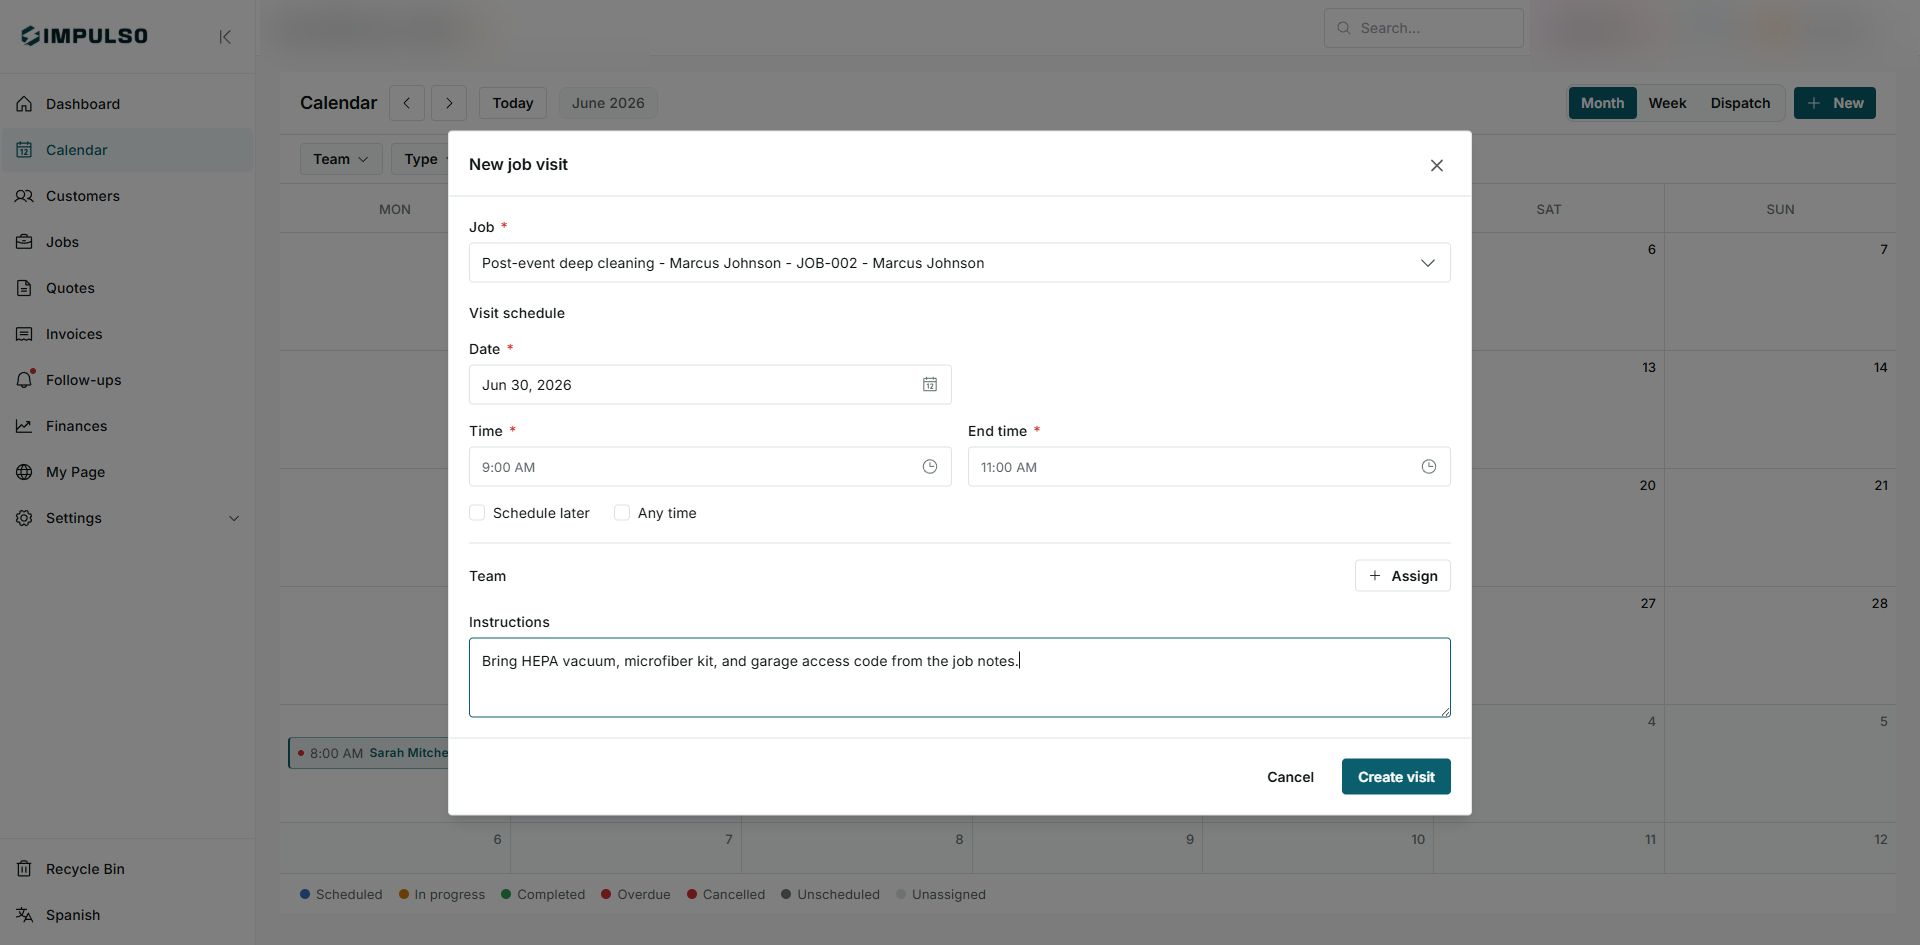
In this example, the visit is prepared for June 30, 2026 from 9:00 AM to 11:00 AM.
4. Add instructions and review
- Write clear instructions for the field team.
- When needed, use Assign to choose who will go onsite.
- Review job, date, schedule, team, and instructions.
- Click Create visit only when you are ready to create it on the calendar.
5. States and controls you may see
The calendar and form use labels to show what type of activity you are creating and what information is still missing before you create it.