

Before you start
- Confirm you are in Finances before comparing amounts.
- Use period filters only when you need to review another month.
- Do not press Save, Export CSV, or Send when you are only reviewing information.
1. Open the form
- Go to Finances.
- Click Add expense.
- Confirm you are creating the expense in the right period.
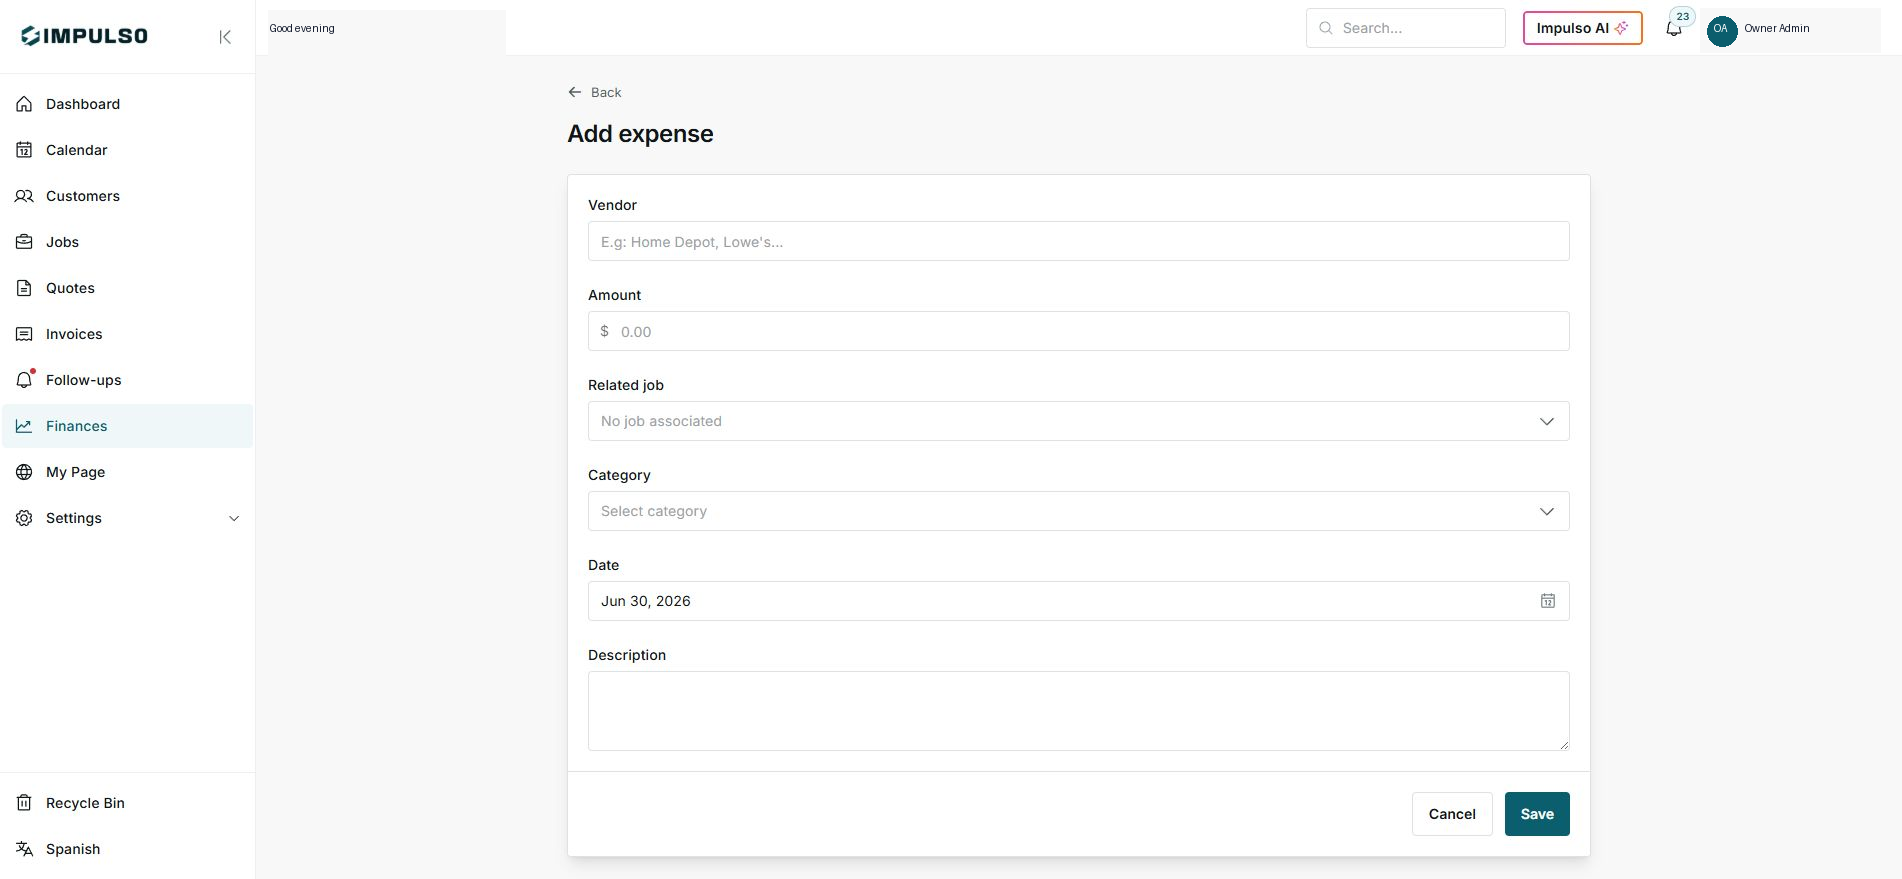
2. Complete the fields
- Enter the vendor, for example Home Depot or Lowe's.
- Add the amount and date.
- Choose a related job only if the expense belongs to a specific job.
3. Classify and review
- Choose a category such as Materials & Supplies, Gas, Tools, or Subcontractors.
- Add a clear description when the expense needs context.
- Press Save only after reviewing the details.
Statuses and options you may see
- No job associated
Means: The expense stays general and is not assigned to a job.
Next step: Use it for rent, phone, advertising, or other general costs.
- Select category
Means: No category has been chosen yet.
Next step: Choose a category when you want cleaner reports.
- Save
Means: Creates the expense with the form details.
Next step: Use it only after amount and date are correct.
- Cancel
Means: Leaves without creating the expense.
Next step: Use it when you were reviewing or are missing information.