

Before you start
- Confirm you are in the correct account before saving changes.
- Do not save, send, collect, or archive when you are only reviewing.
- Use real United States service names such as roofing, gutters, HVAC, window cleaning, or exterior painting.
1. Review the job
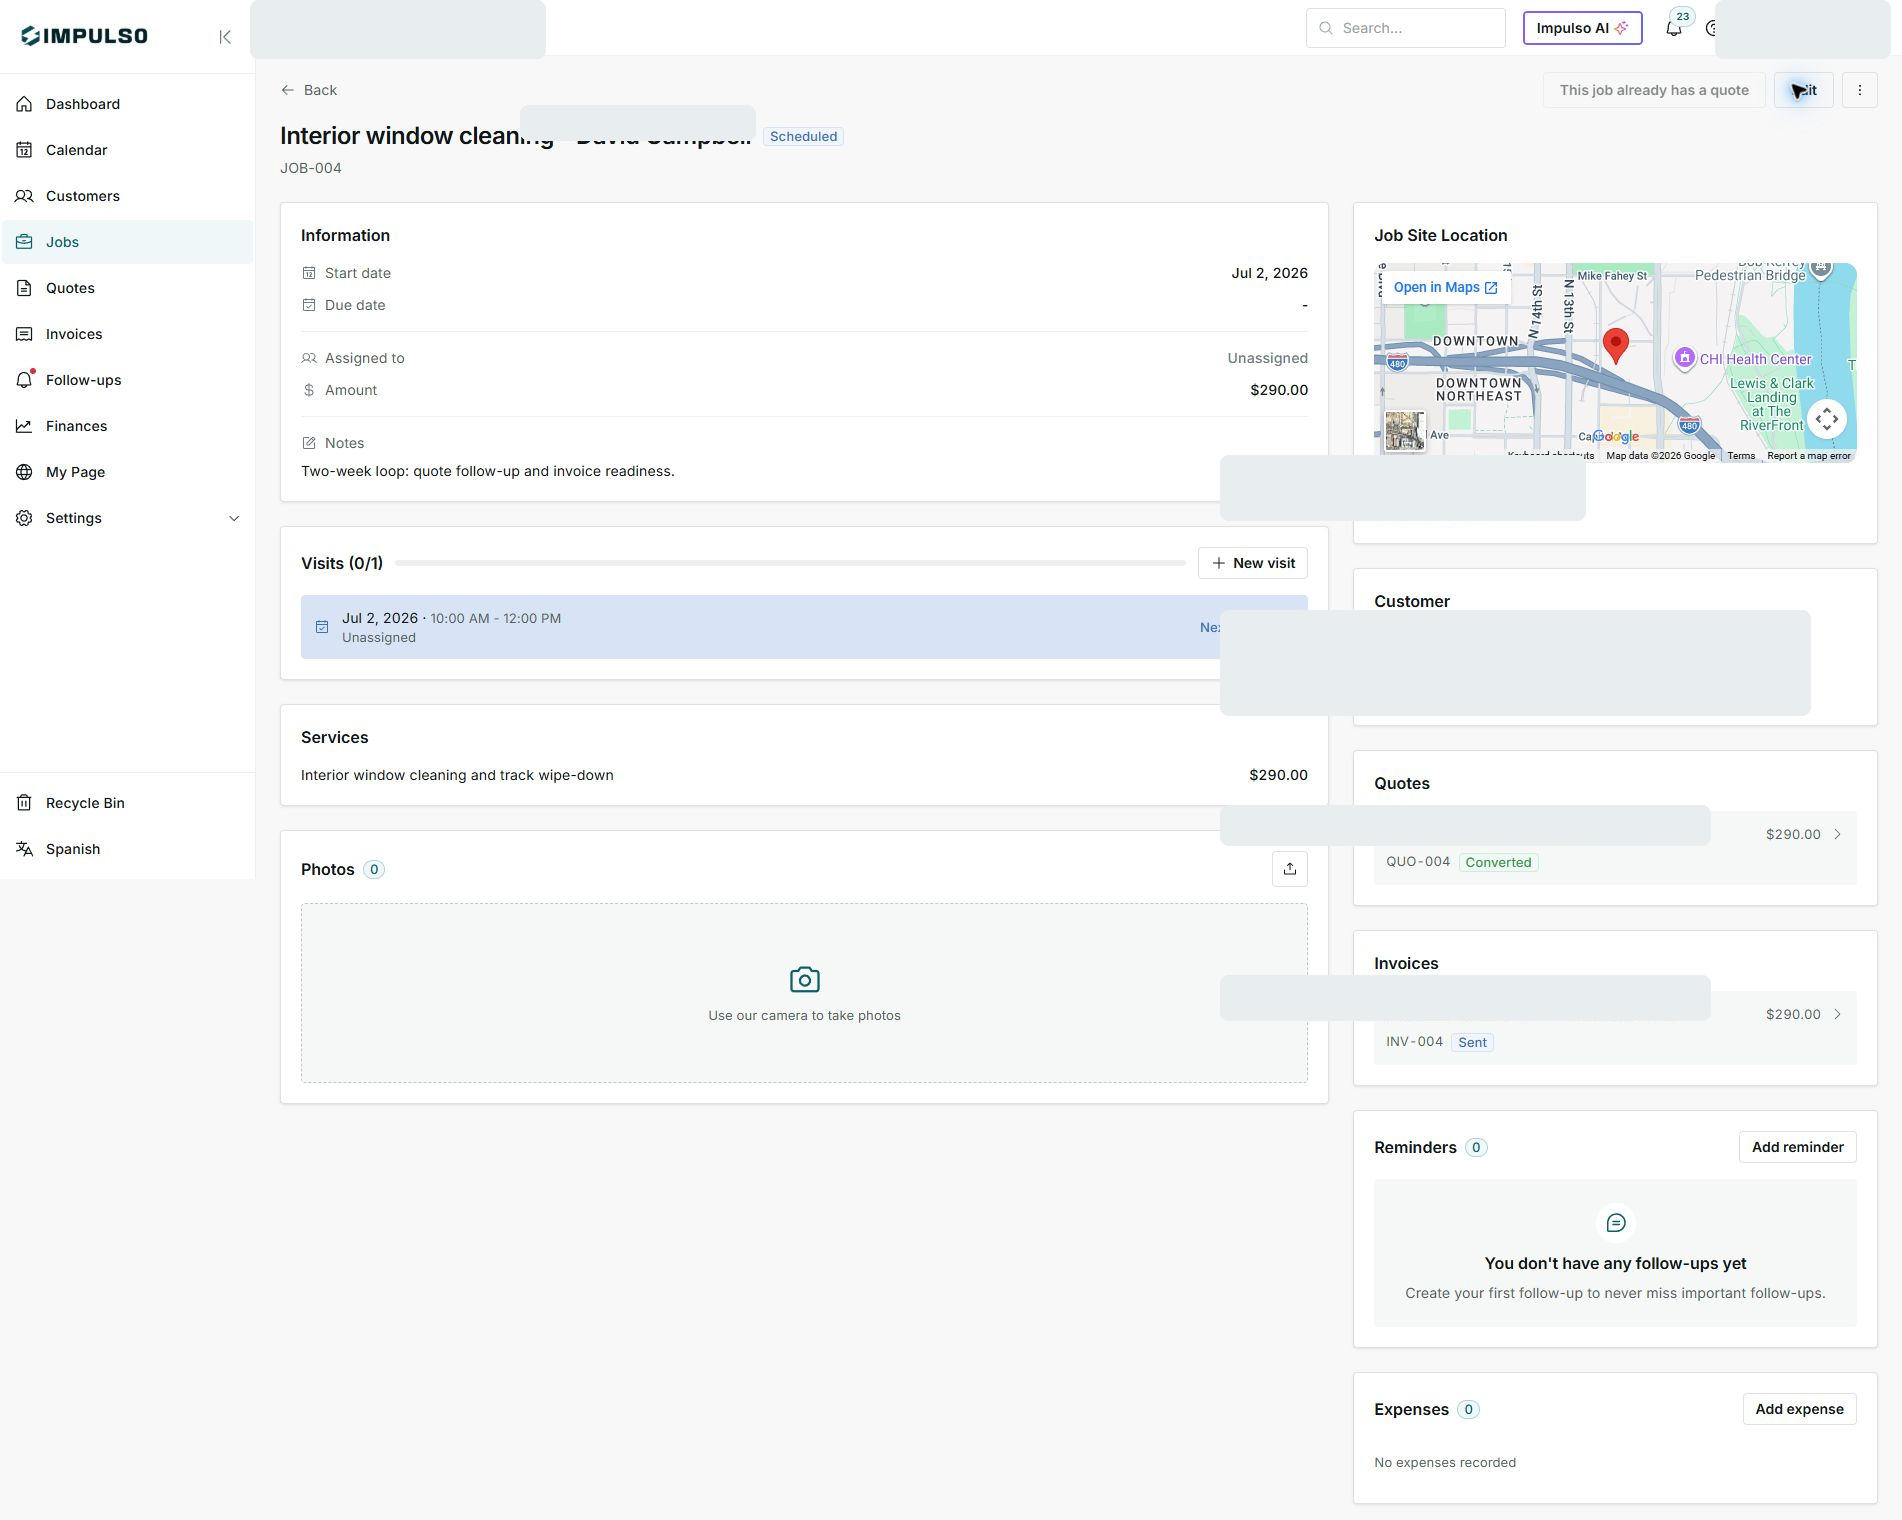
- Go to Jobs and open the job you want to invoice.
- Confirm the amount, services, and status beside the title.
- If an Invoices card already appears, open that invoice instead of creating another one.
2. Prepare the invoice
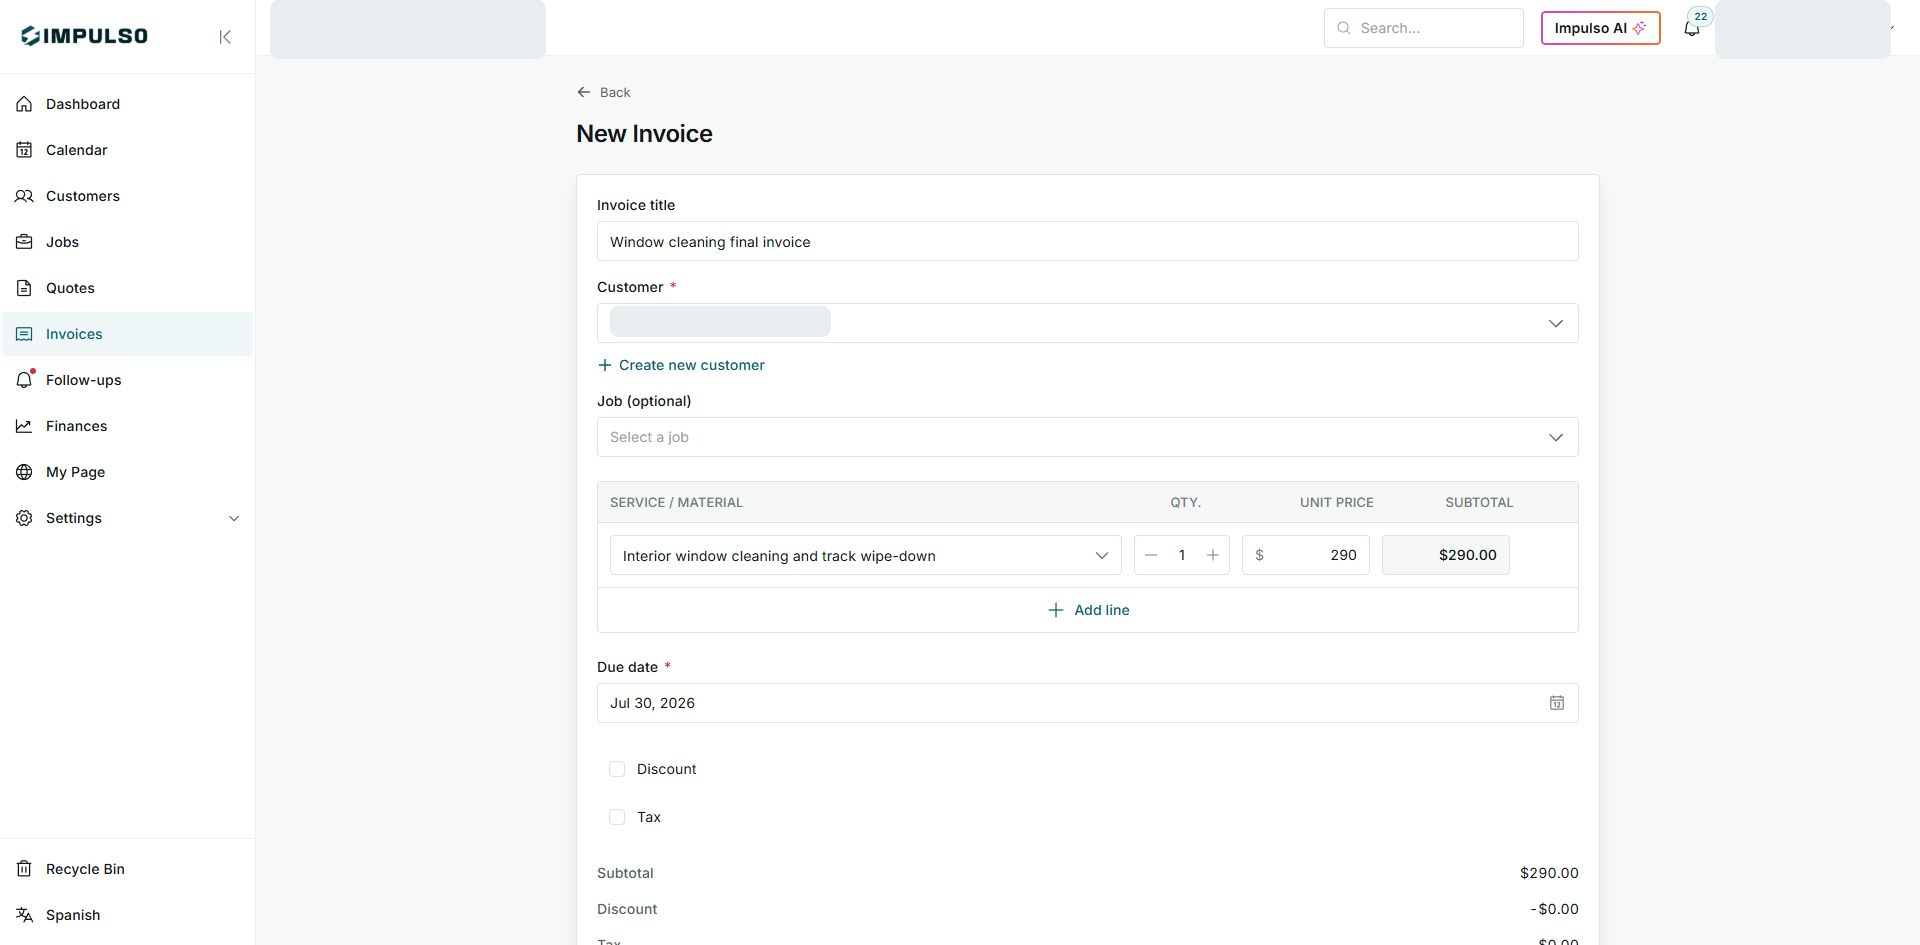
- Go to Invoices and open New Invoice.
- Select the customer and use Job (optional) when the invoice should stay connected to the job.
- Review services, due date, discount, and tax before saving.
3. Avoid duplicates
- Do not create another invoice if the job already shows a related invoice.
- If the invoice already exists, use the Invoices card to review status and amount.
- If details are missing, go back to the job or quote before sending anything to the customer.
States and options you may see
- Scheduled
Means: The job has a date or visit planned.
Next step: Confirm the service is ready before invoicing.
- Converted
Means: The quote has already been converted into the job.
Next step: Do not duplicate work from the same quote.
- Sent
Means: The invoice has already been sent to the customer.
Next step: Open the existing invoice to review or collect.
- Job (optional)
Means: Connects the invoice to a job.
Next step: Use it when the history should stay together.