

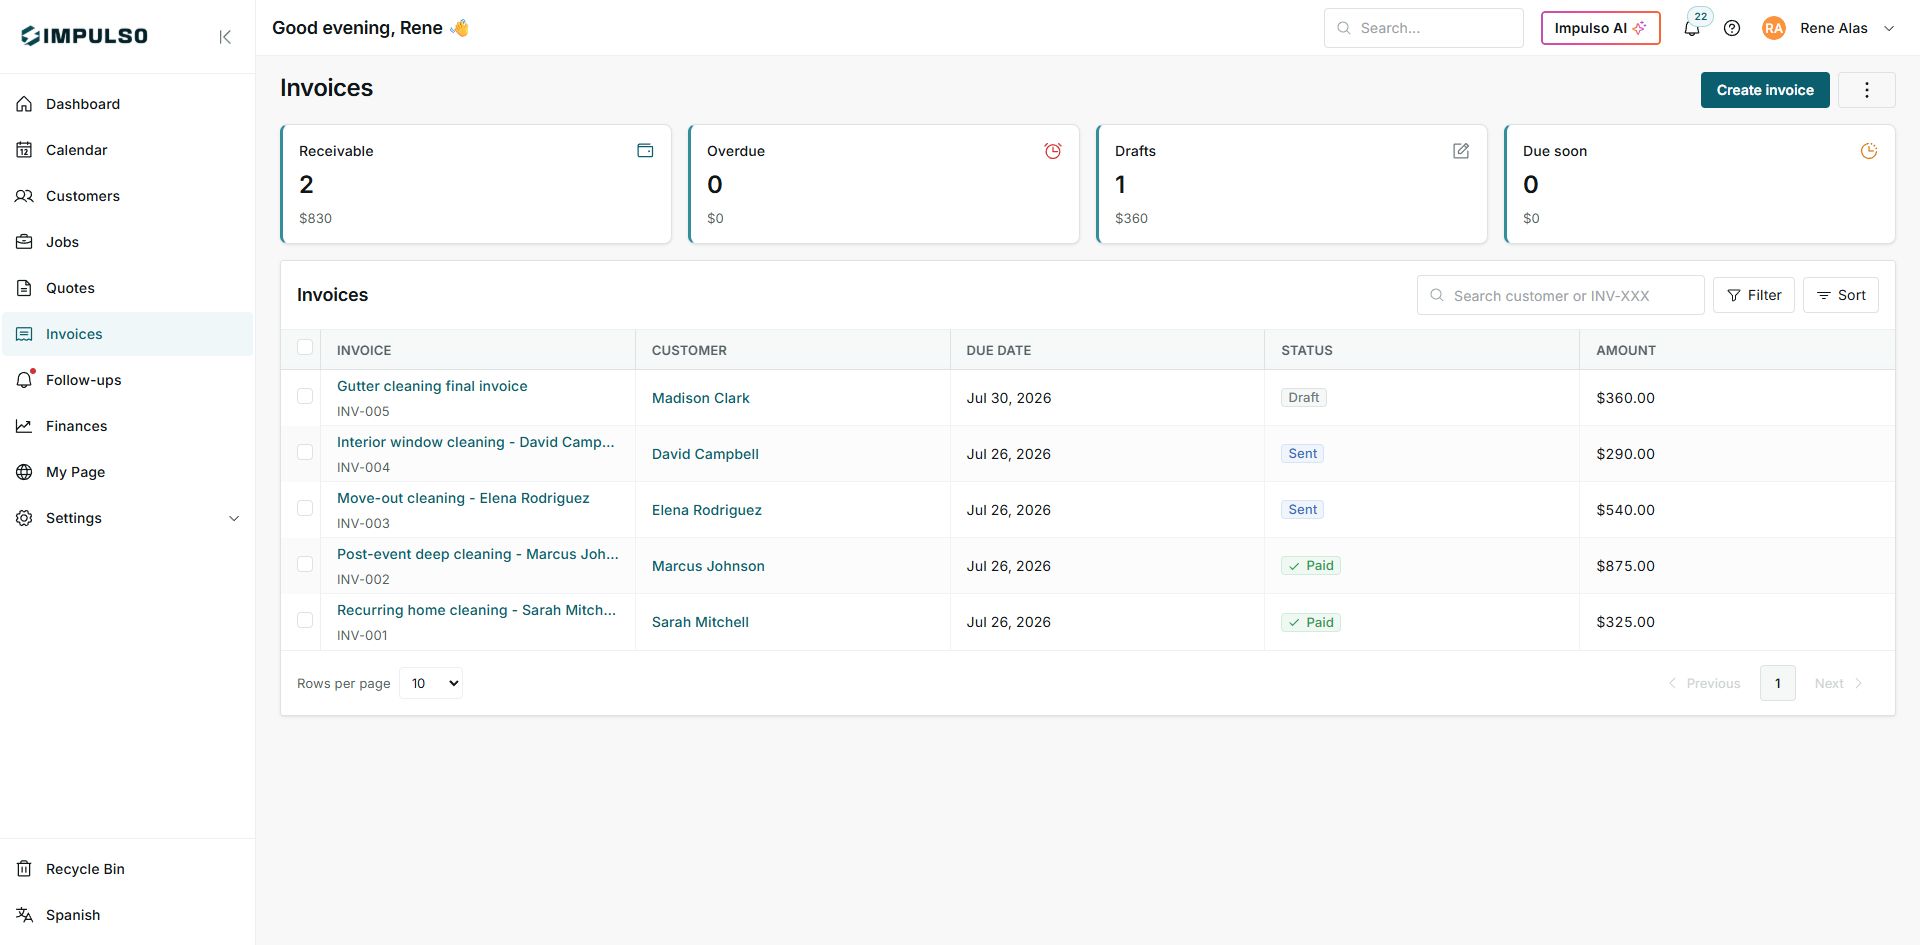
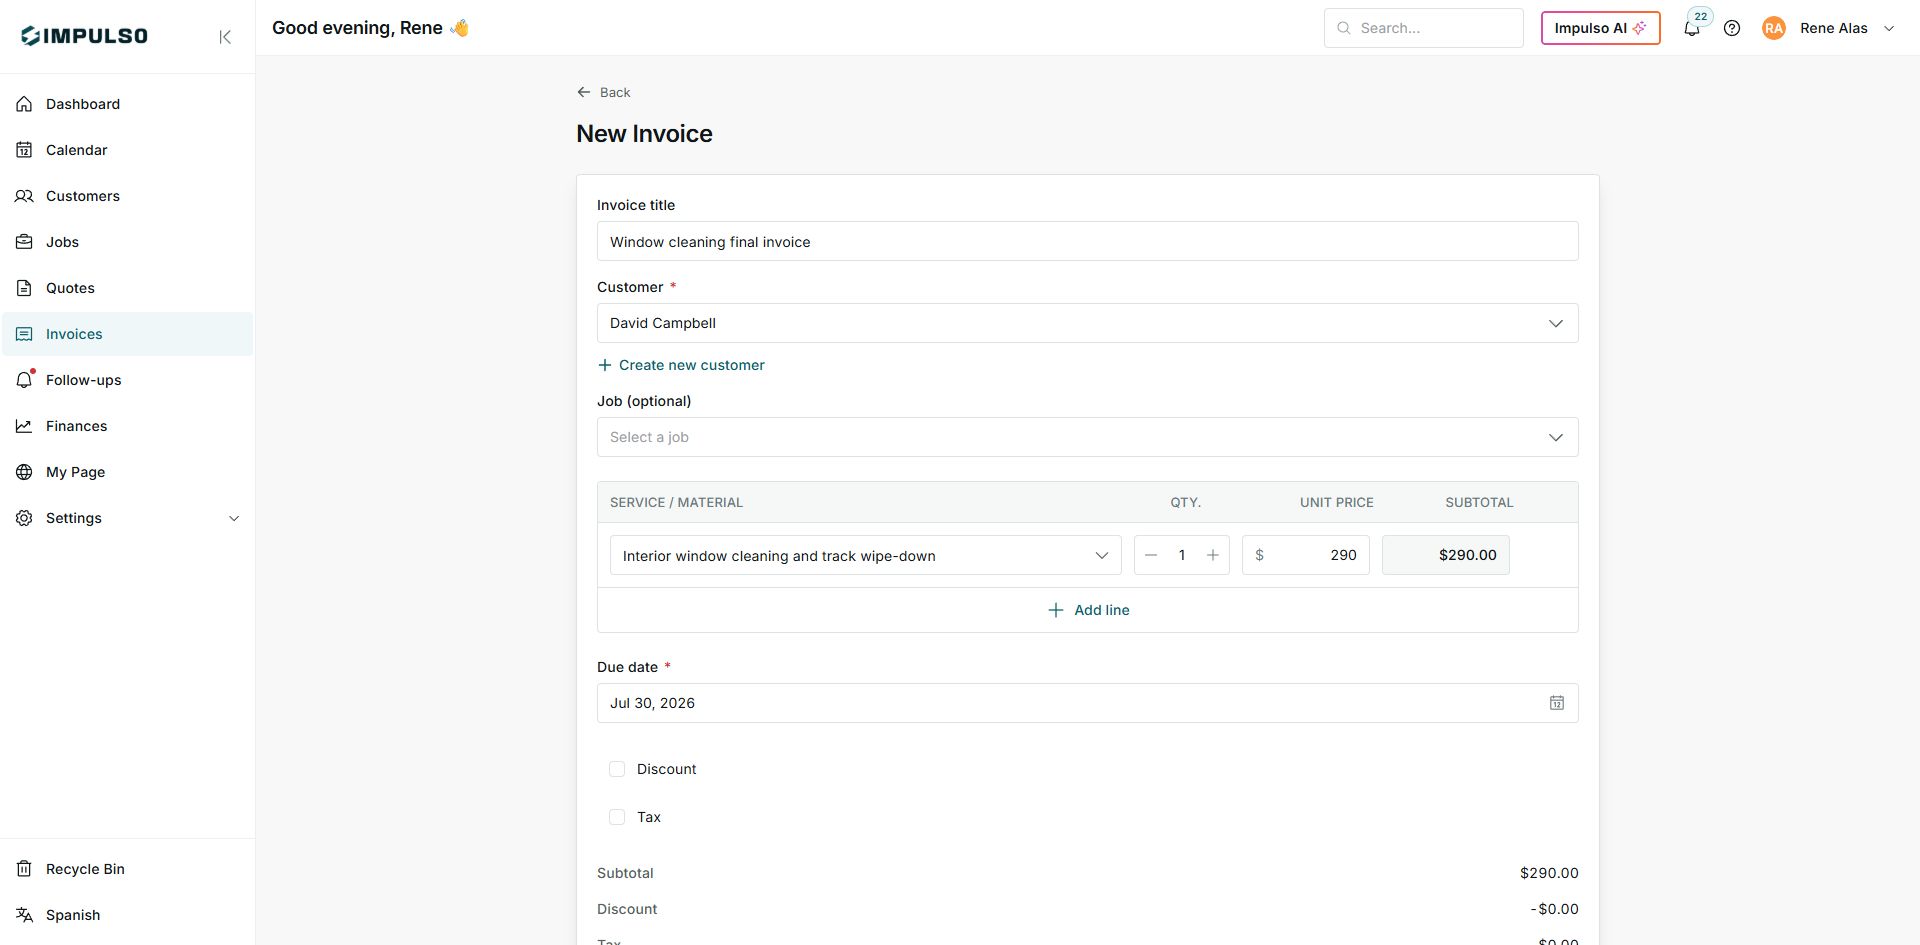
1. Create the Invoice
- Open Invoices and click Create invoice.
- Complete customer, service, price, and due date.
- Save the invoice so you can review it as a draft.
2. Prepare the Email
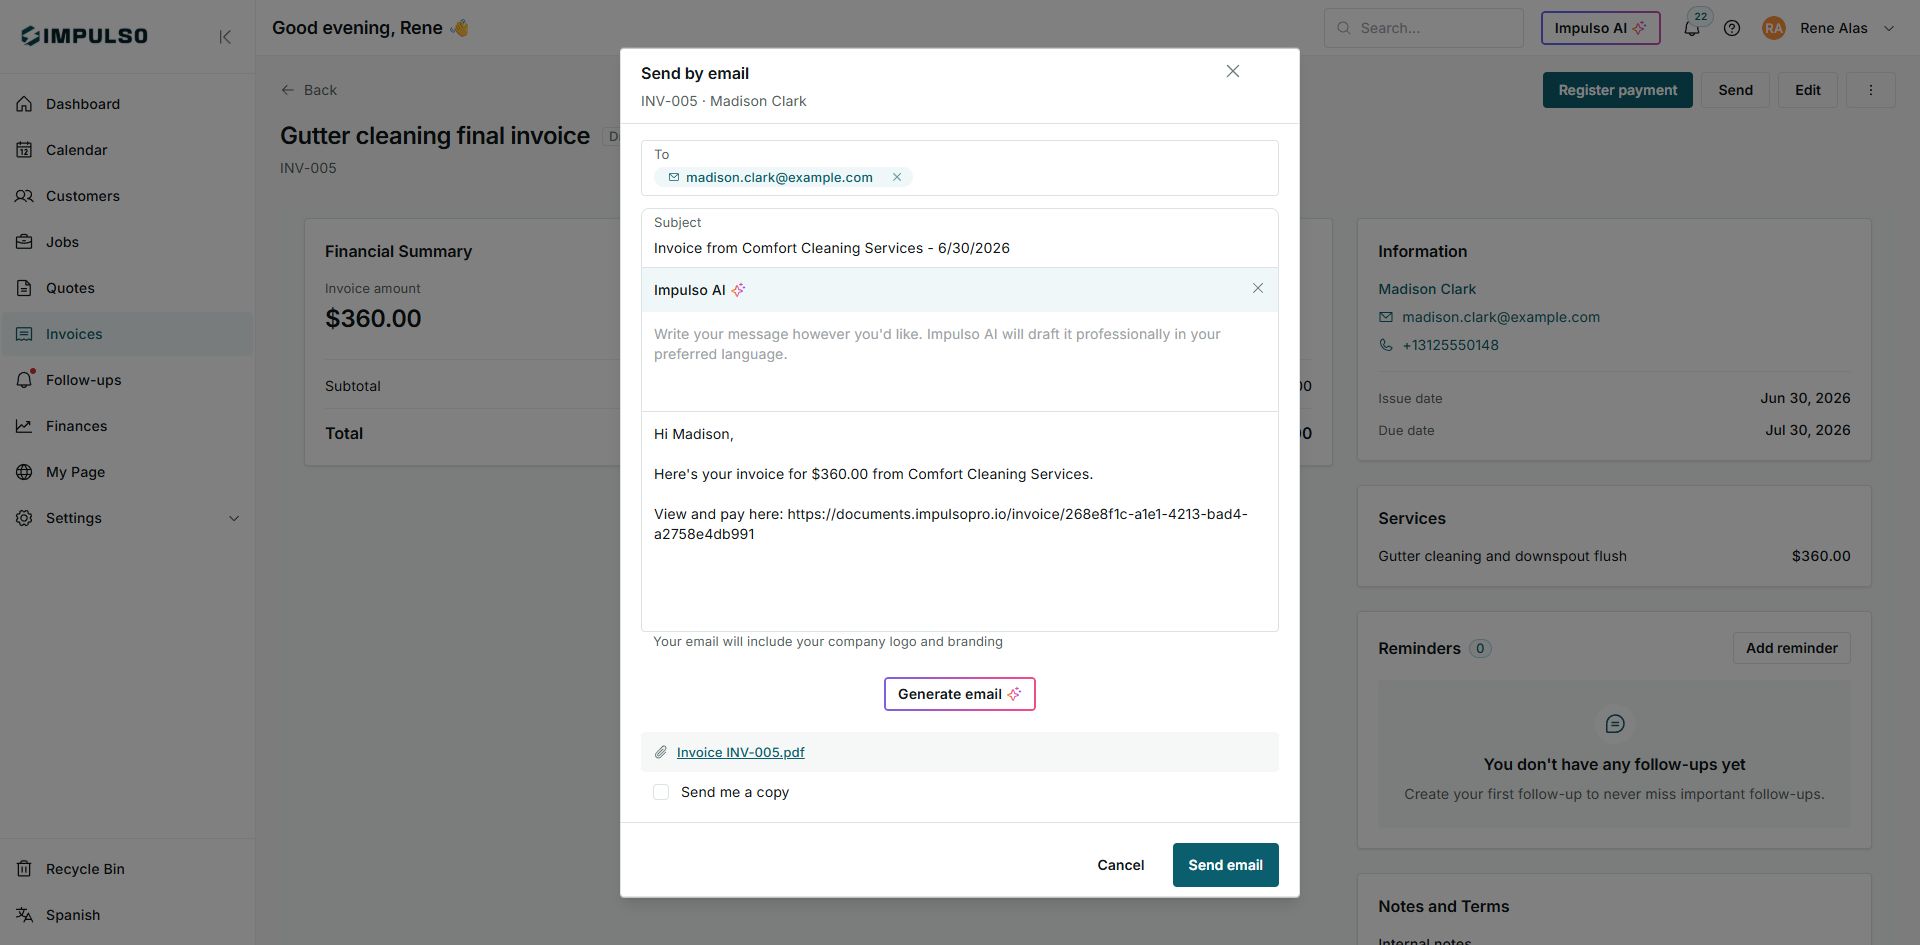
- From the detail page, click Send.
- Choose Email.
- Review recipient, subject, message, and PDF.
- Click Send email only when everything is correct.
States You May See
- Draft
Meaning: The invoice exists, but it has not been sent to the customer yet. Where it appears: Invoice list and detail. Next step: Review and send it when ready. It does not mean: It does not mean the customer received it.
- Sent
Meaning: The invoice was sent to the customer and may still need payment. Where it appears: Invoice list and detail. Next step: Follow up or record payment when appropriate. It does not mean: It does not mean it is paid.
- Paid
Meaning: The invoice has no remaining balance. Where it appears: Invoice list and detail. Next step: Review history or receipts if needed. It does not mean: It does not automatically change the job status.
- Balance due
Meaning: There is still an amount to collect. Where it appears: Financial summary. Next step: Record payment or send a reminder when appropriate. It does not mean: It does not mean the customer viewed the invoice.