

Before you start
- Confirm you are in Finances before comparing amounts.
- Use period filters only when you need to review another month.
- Do not press Save, Export CSV, or Send when you are only reviewing information.
1. Review existing categories
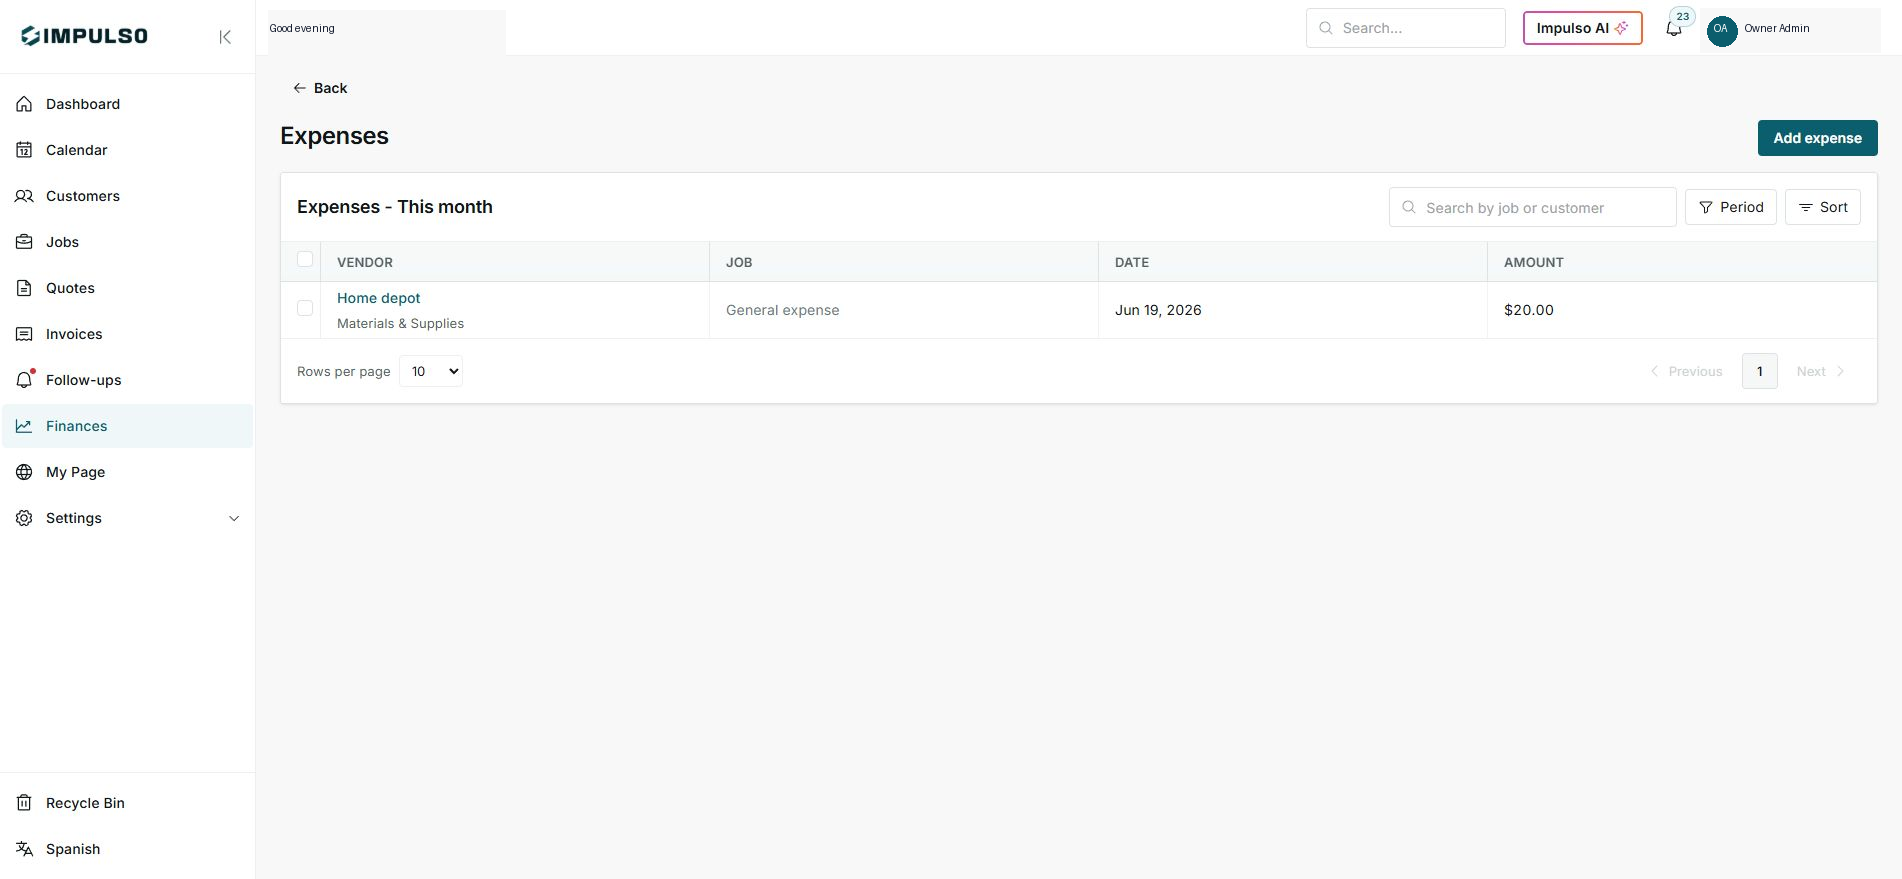
- Open Finances > Expenses.
- Each row shows the vendor and category below the name.
- Use this view to spot uncategorized or incorrectly classified expenses.
2. Choose the right category
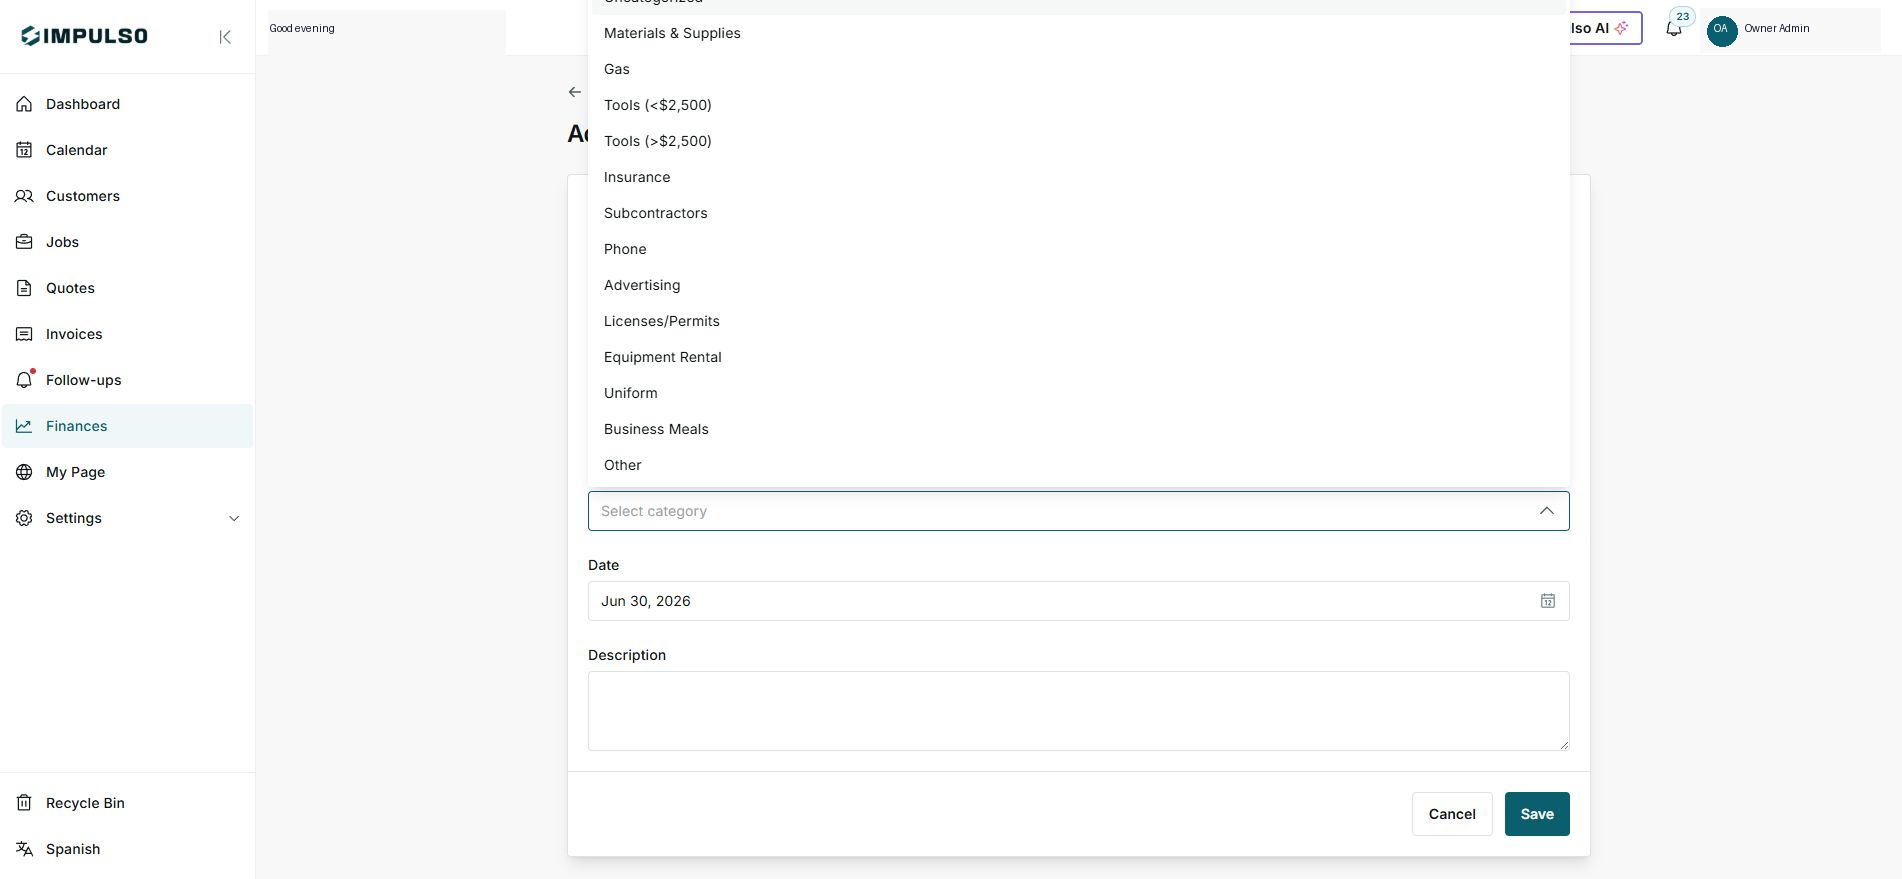
- When creating an expense, open Category.
- Select Materials & Supplies, Gas, Tools, Insurance, Subcontractors, or another matching option.
- Consistent categories make profitability easier to read.
3. Keep a stable rule
- Use Materials & Supplies for job materials.
- Use Gas for fuel.
- Use Other only when no category describes the expense.
Statuses and options you may see
- Uncategorized
Means: The expense has no specific classification.
Next step: Choose a category when the expense repeats or must be reported.
- Materials & Supplies
Means: Materials used on jobs.
Next step: Use it for paint, shingles, drywall, or supplies.
- Gas
Means: Fuel for the team or vehicles.
Next step: Keep it separate from materials.
- Subcontractors
Means: Cost of third parties helping on a job.
Next step: Connect it to the job when it applies.
- Other
Means: General category for rare cases.
Next step: Avoid it when a more precise category exists.