

Before you start
- Confirm you are in Finances before comparing amounts.
- Use period filters only when you need to review another month.
- Do not press Save, Export CSV, or Send when you are only reviewing information.
1. Review the expense list
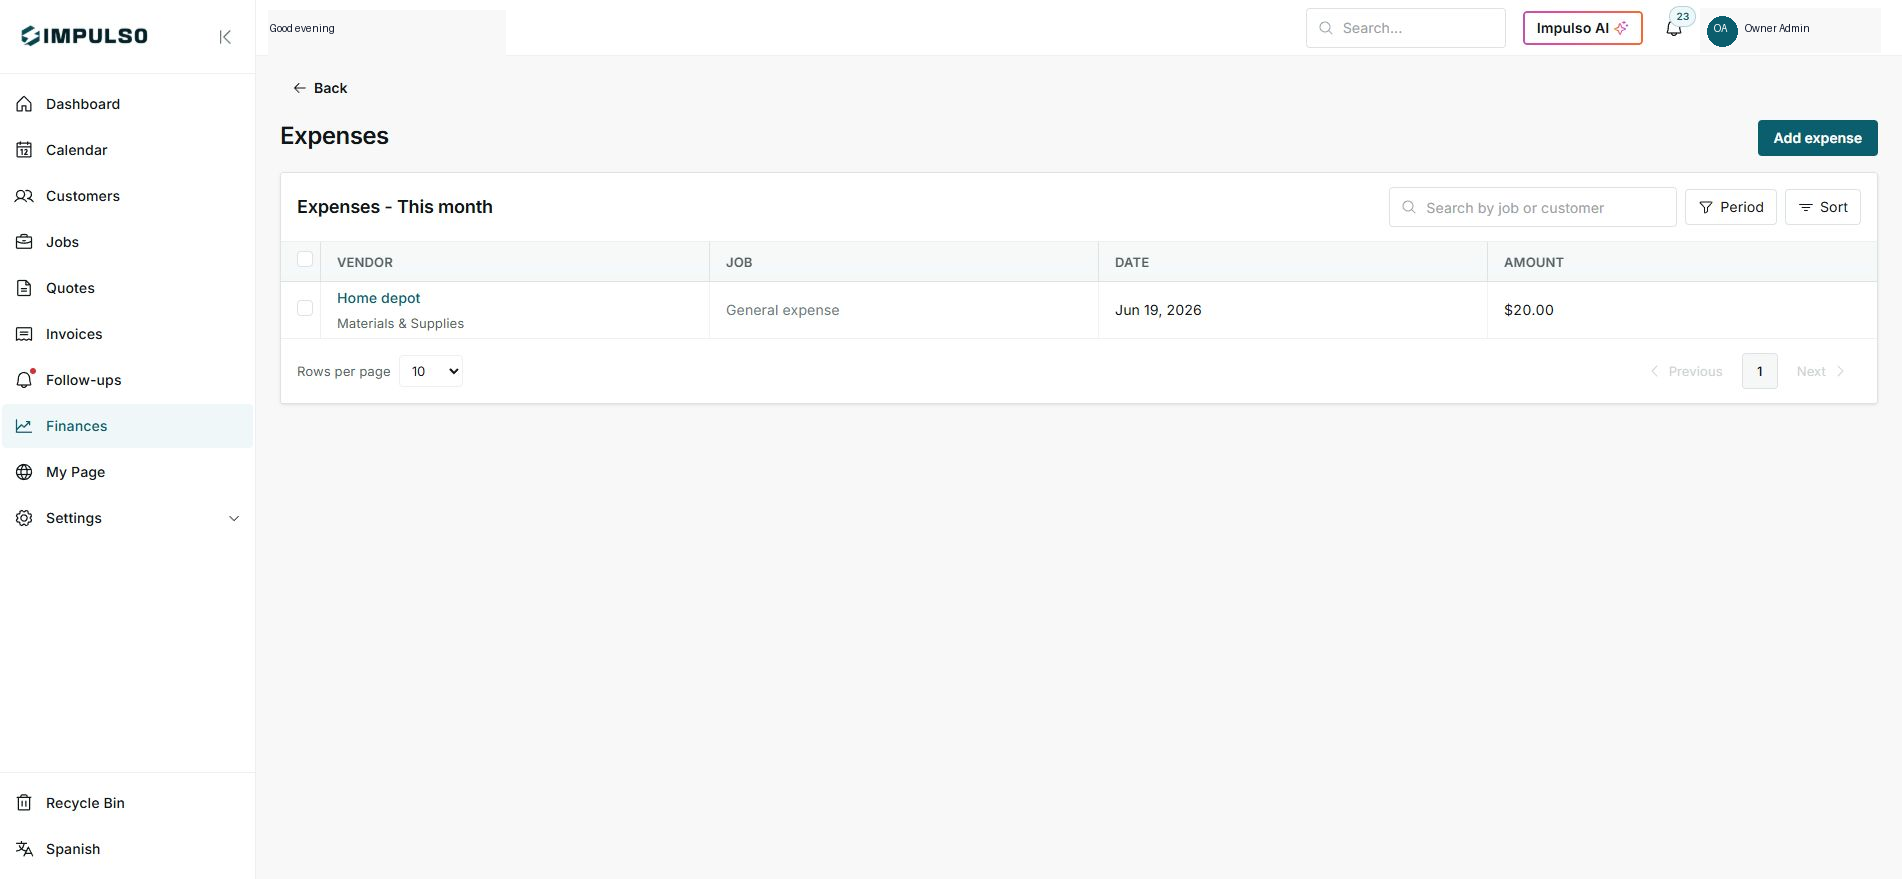
- Open Finances > Expenses.
- Check vendor, category, job, date, and amount.
- Use period, search, or sort to find existing expenses.
2. Add a new expense
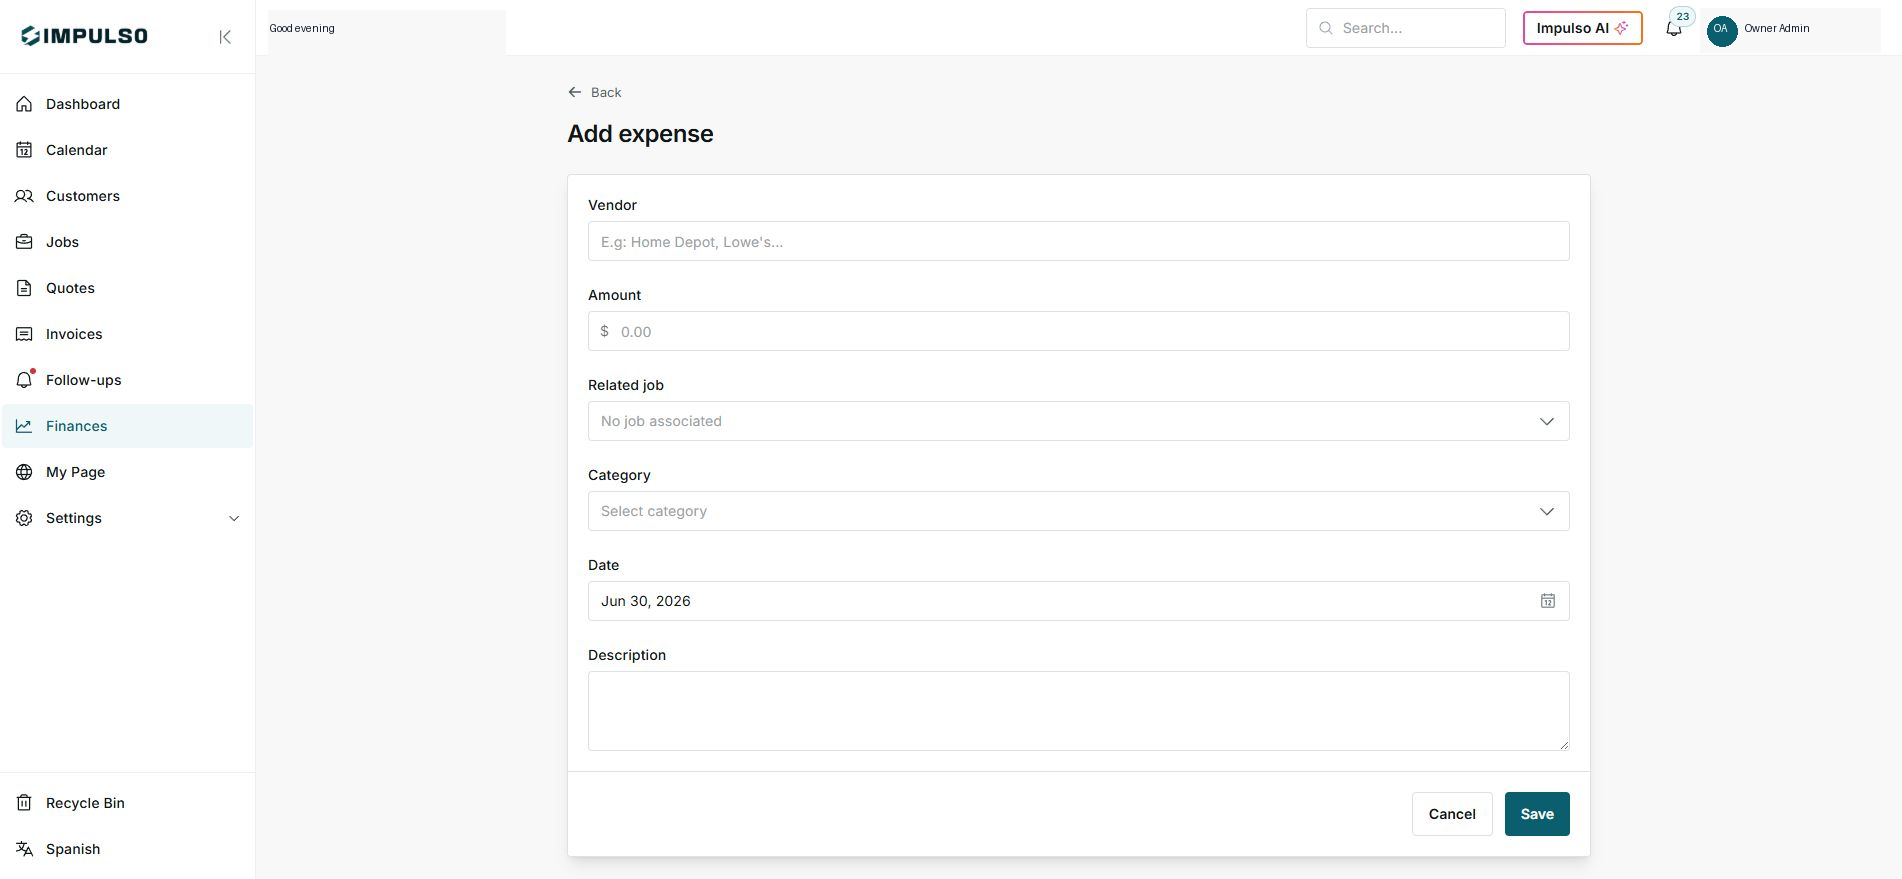
- Click Add expense.
- Complete vendor, amount, related job, category, date, and description.
- If the expense is general, leave No job associated.
3. Save and confirm
- Save only when amount and date are correct.
- After saving, return to Expenses and confirm it appears in the right period.
- If it does not appear, change the period or search filter.
Statuses and options you may see
- This month
Means: Current filtered period.
Next step: Change it when looking for expenses from another month.
- General expense
Means: Expense without a related job.
Next step: Use it for general business costs.
- Period
Means: Filter for another time range.
Next step: Check this if an expense is missing.
- Sort
Means: Changes the list order.
Next step: Use it to review date or amount.
- Save
Means: Creates the expense.
Next step: Do not press it until you finish reviewing.