

Before you start
- A follow-up is a task that reminds you to call, email, or review something internally.
- A visit is a scheduled job appointment on the calendar; a follow-up is the next step you do not want to miss.
- Create follow-up opens the form for a new follow-up; saving it creates a real record.
- If you are only reviewing, do not select rows or use actions that change status.
1. Open Follow-ups
- In the left menu, click Follow-ups.
- Review the top counters: active, overdue, today, and upcoming.
- Use the table to see customer, scheduled date, linked record, type, and status.
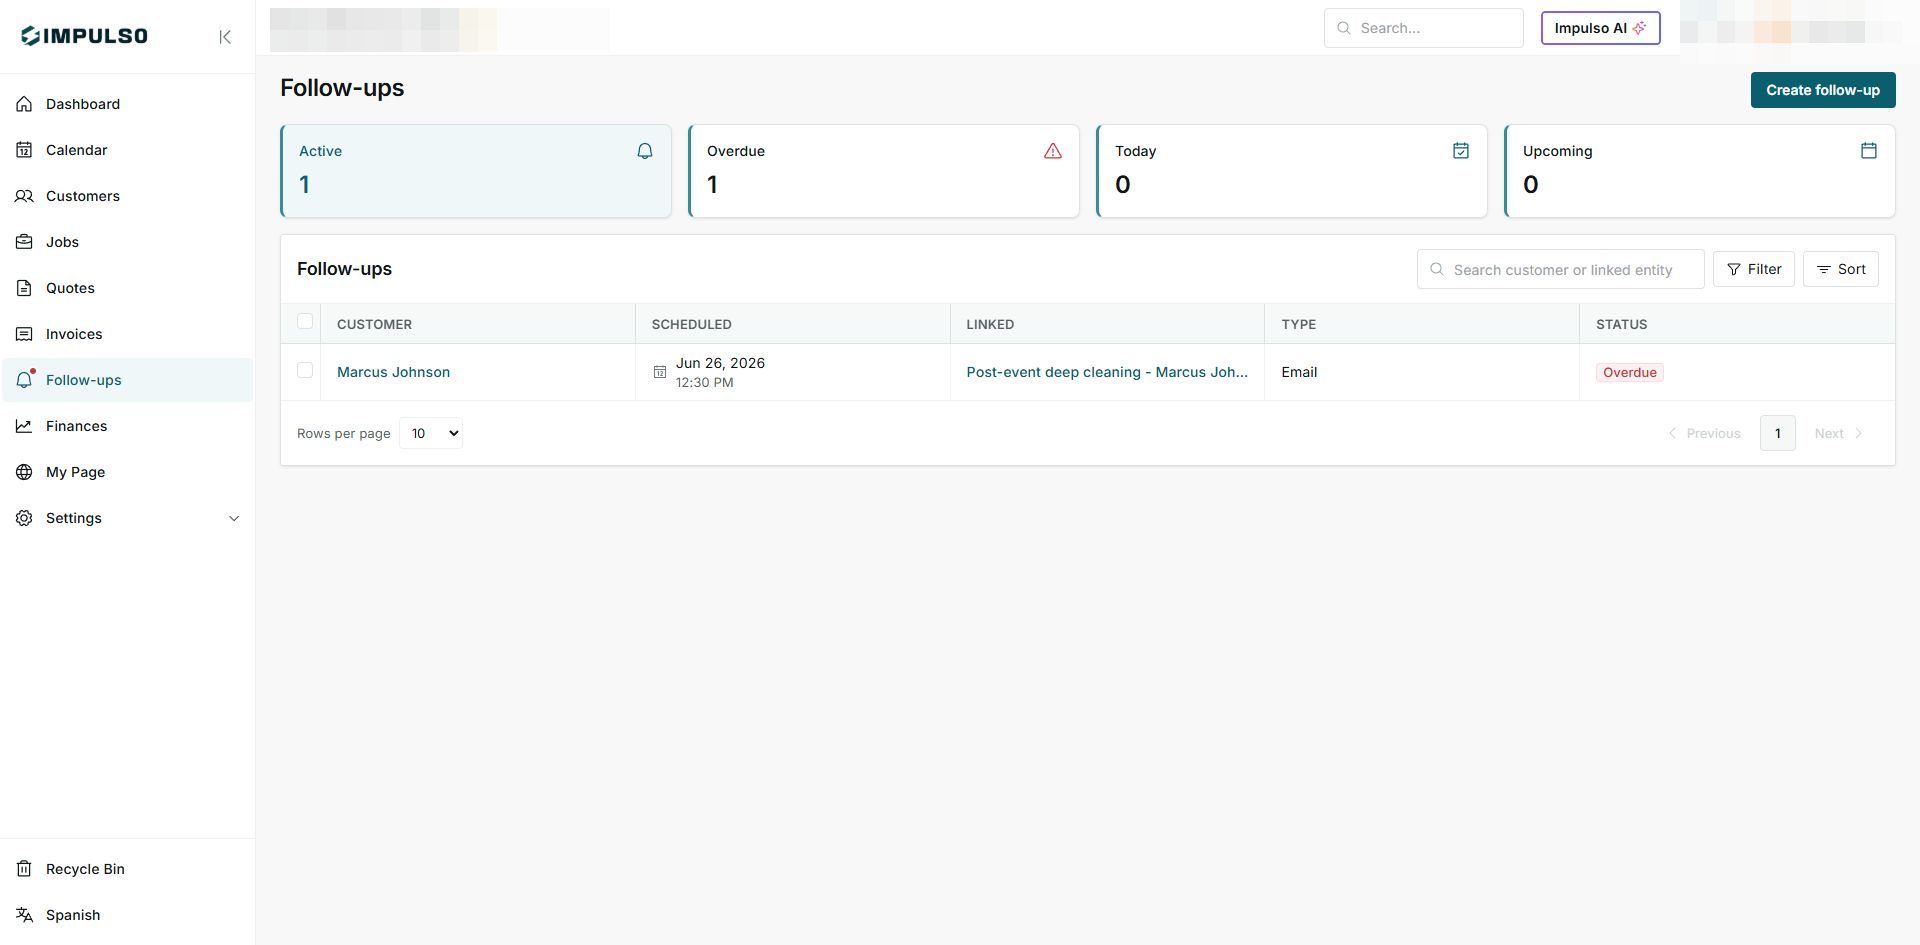
The list prioritizes what needs action and shows customer context without opening the detail page.
2. Read a row
- Customer shows who the follow-up belongs to.
- Scheduled shows the date and time for the next step.
- Linked shows whether the follow-up belongs to an invoice, job, quote, or visit.
- Type shows whether the next step is a call or email.
- Status shows whether it is overdue, due today, pending, or completed.
3. Filter the list
- Use search to find a customer or linked record.
- Click Filter.
- Choose All, Completed, Call, or Email depending on what you need to review.
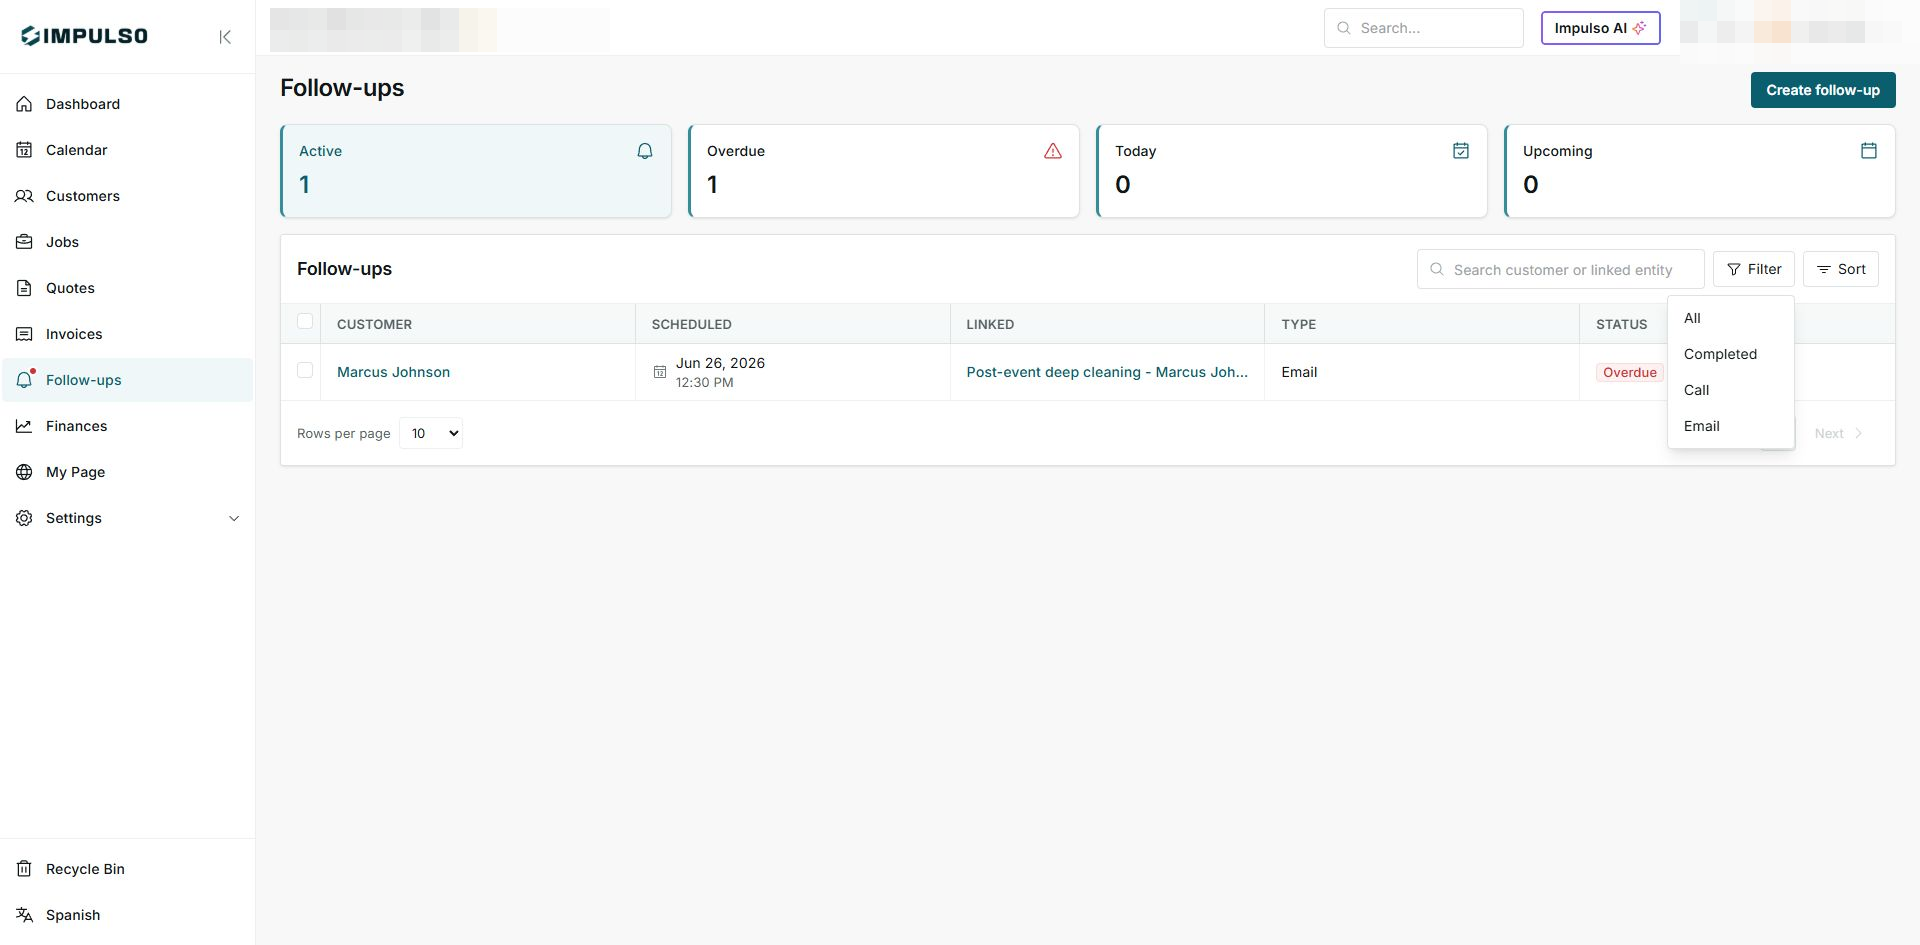
Filtering helps you focus on calls, emails, or follow-ups already marked complete.
4. Sort by priority
- Click Sort.
- Use Upcoming first to work in calendar order.
- Use Overdue first to handle the most urgent items.
- Use Newest to review recently added follow-ups.
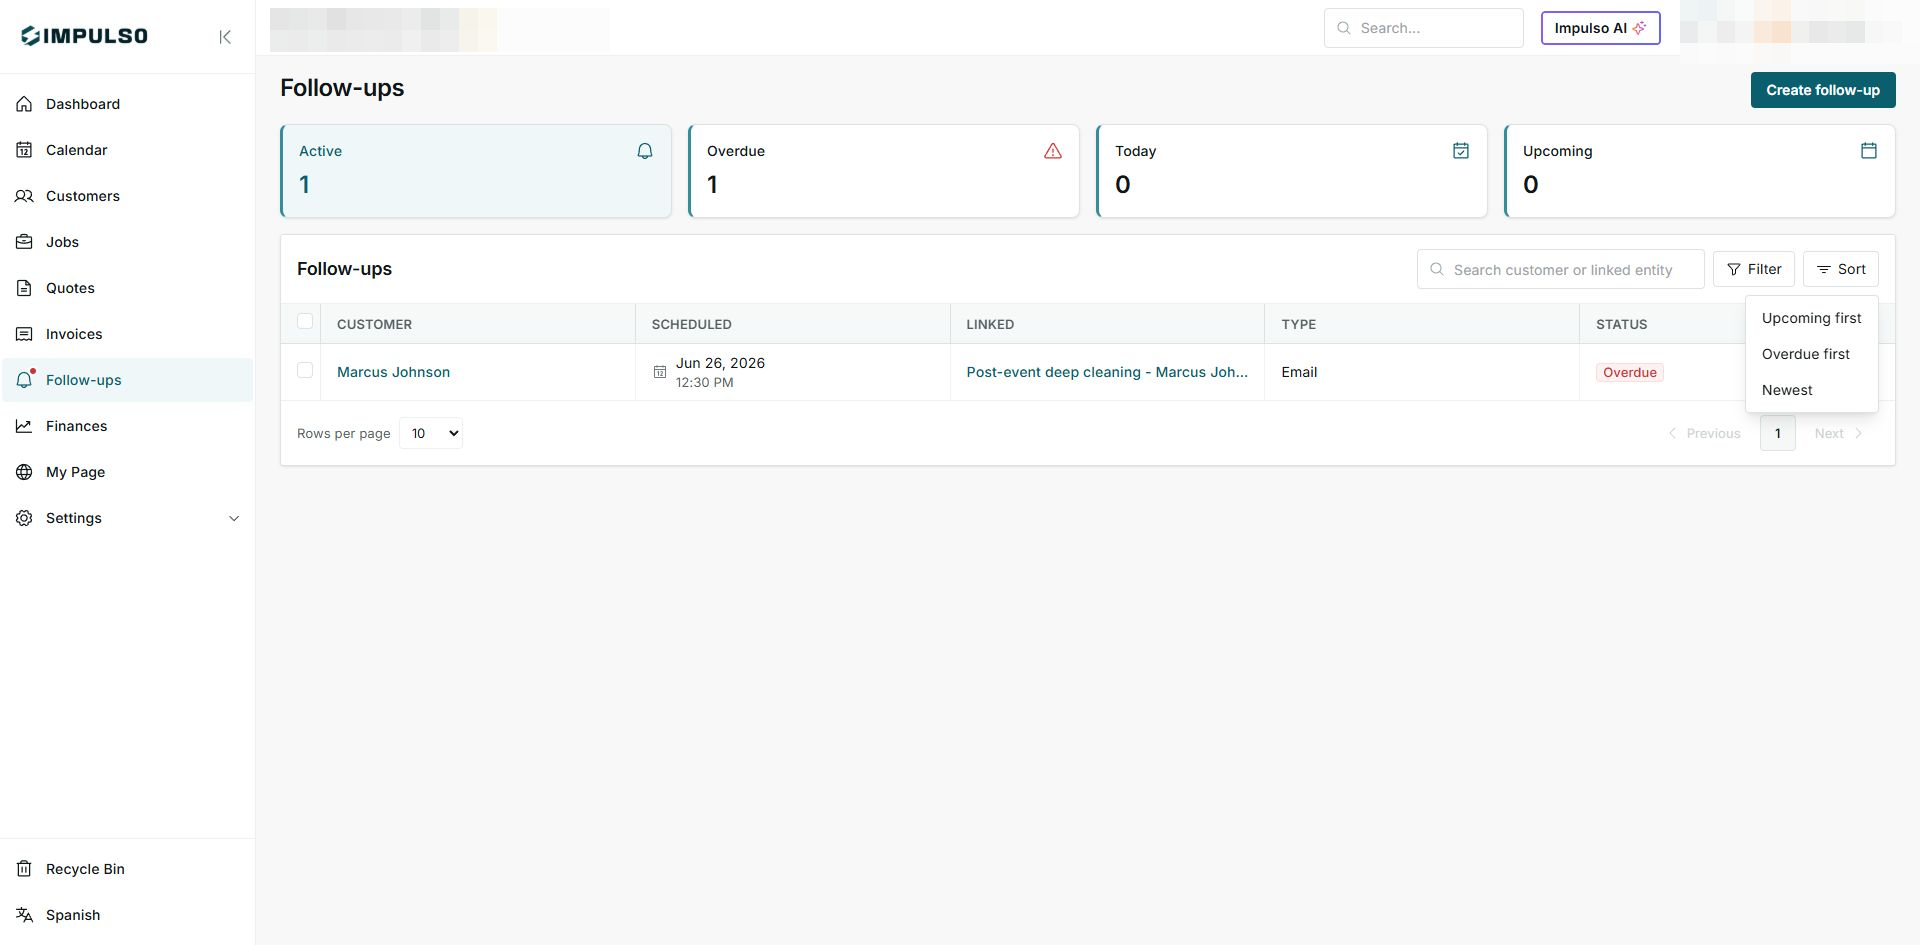
Sorting does not change the follow-up; it only changes how you view the list.
5. States and controls you may see
These states help you decide what to handle first and what action the team should take.