

Before You Start
- Confirm the customer is not already in Customers.
- Have the main name, phone, email, and address ready.
- Use normal business terms such as roofing, HVAC, gutters, or exterior painting when you describe work context in internal notes.
- Do not save sensitive information your team does not need to run the job.
1. Open New Customer
- Go to Customers.
- Click New customer or open the matching action from the list.
- Confirm you are on the New customer screen.
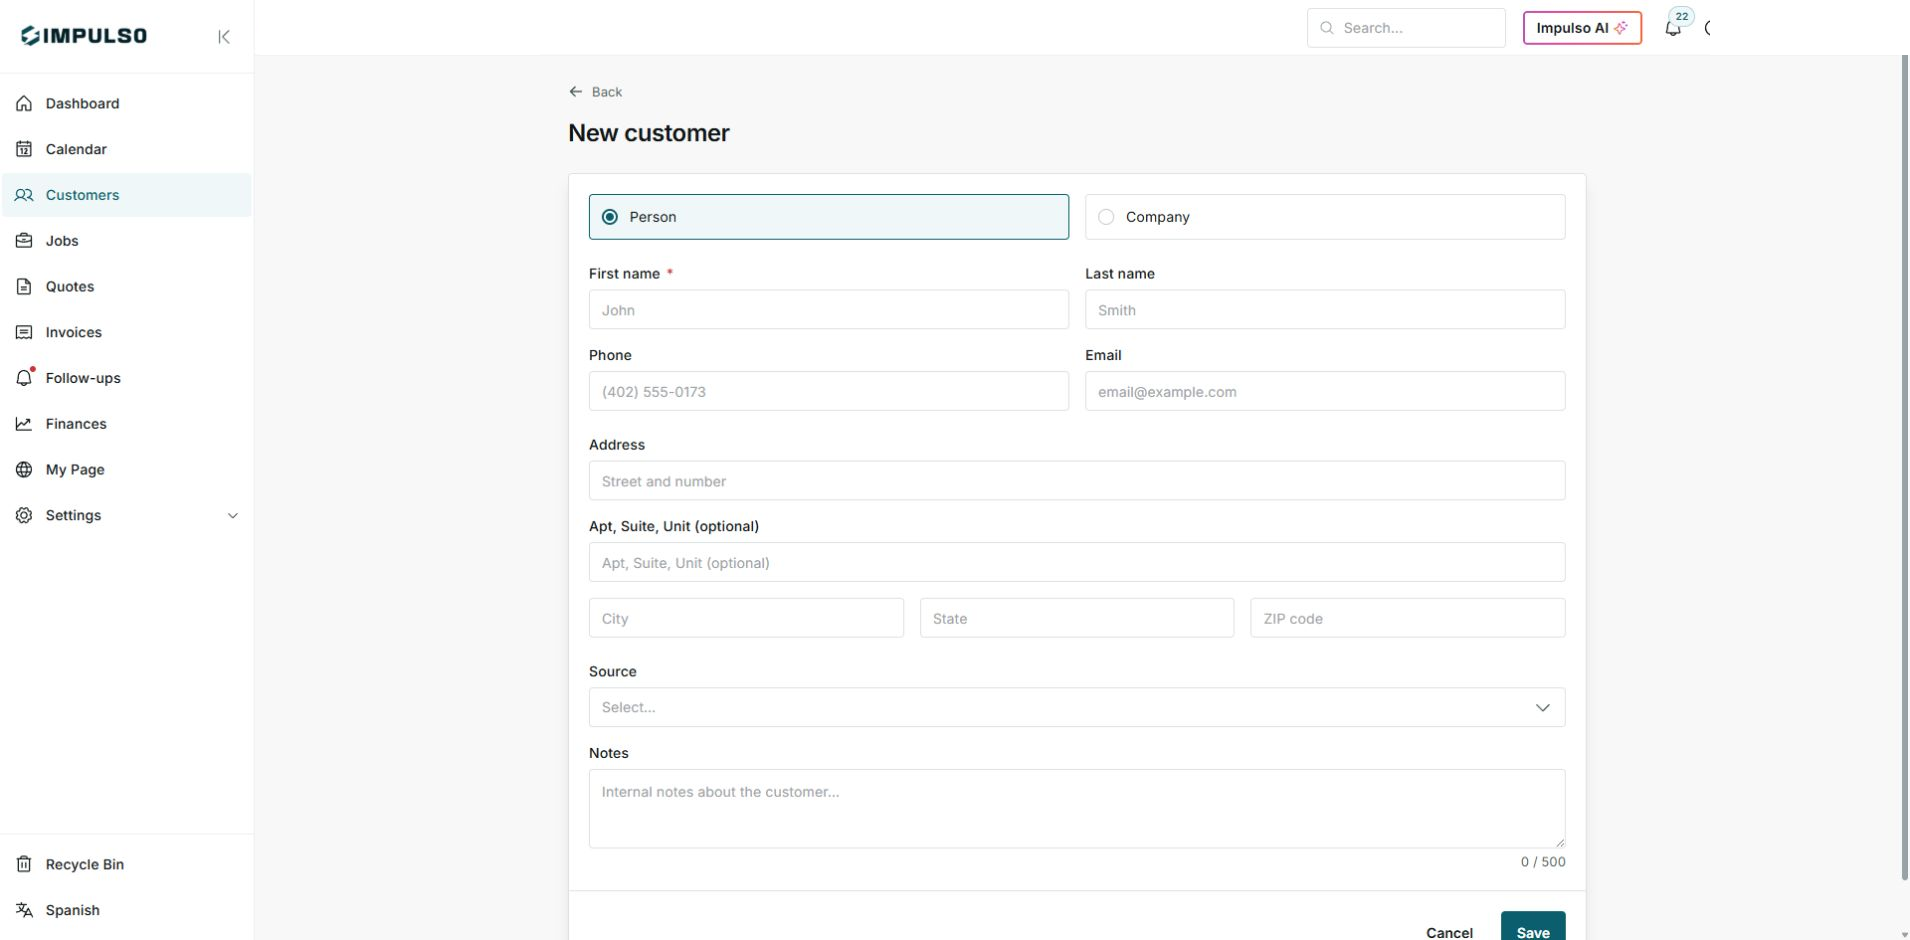
The screen lets you choose Person or Company and add contact details, address, source, and notes.
2. Choose Person or Company
- Choose Person when you are adding an individual contact.
- Choose Company when the customer is a business.
- Complete the required name before saving.
3. Add Contact and Address
- Enter first name and, when useful, last name.
- Add phone and email so your team can reach the customer.
- Complete the address with street, city, state, and ZIP code.
- Use the unit or suite field only when it applies.
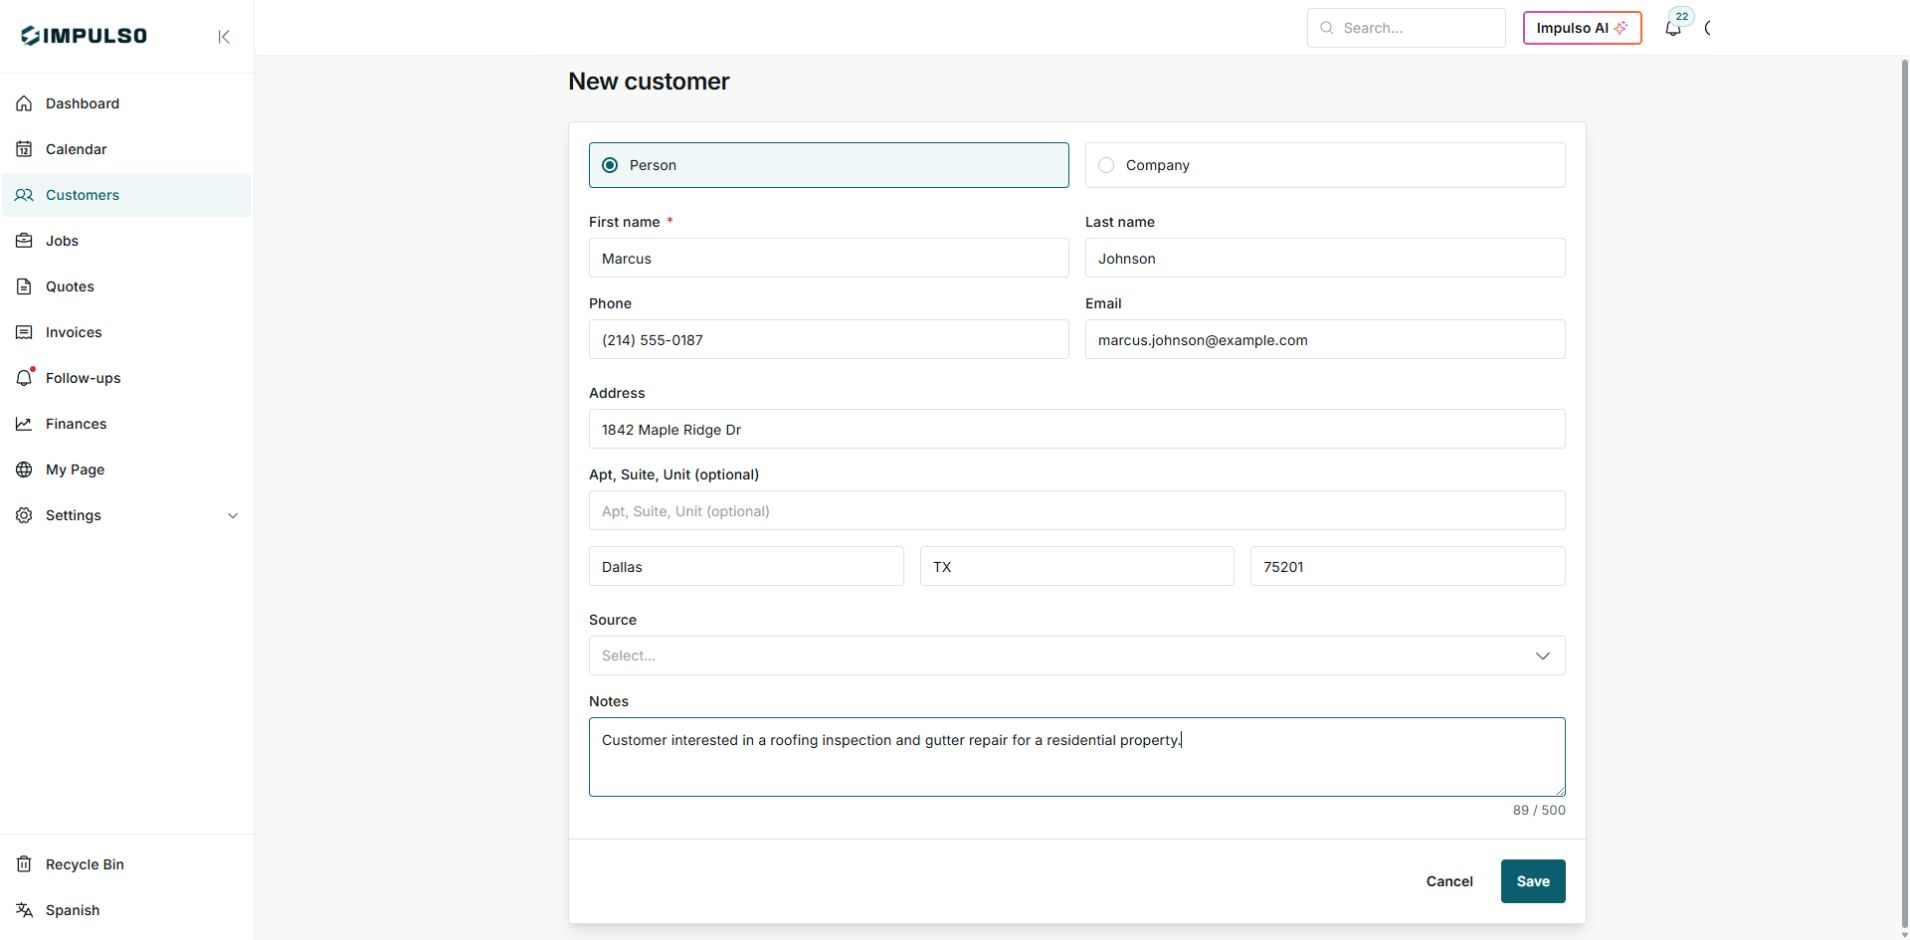
This example uses a residential customer in Dallas interested in a roofing inspection and gutter repair.
4. Review Source and Notes
- Source helps you know whether the customer came from a referral, Google, social media, website, or another channel.
- Notes are internal. Use them for work context, preferences, or follow-up details your team needs to remember.
- Avoid passwords, full banking details, or information that is not necessary.
5. Save or Cancel
- Review name, contact details, and address.
- Click Save when you want to create the customer.
- Click Cancel if you do not want to keep the form.
After the customer is created, you can use that customer when preparing jobs, quotes, invoices, and follow-ups.
6. States and Controls You May See
These states help you understand what happened with the customer record or what information is missing.
- Saved
Meaning: Impulso Pro accepted the new customer. Where it appears: after saving. Next step: open the profile or create the related job, quote, or follow-up. It does not mean: a message was sent to the customer.
- Error
Meaning: the customer could not be created. Where it appears: near the form or as an on-screen notice. Next step: check required fields and email format. It does not mean: there is always a duplicate customer.
- No address
Meaning: the customer may not have a main address saved. Where it appears: in lists or profiles when that detail is missing. Next step: add an address if you need visits or complete documents. It does not mean: the customer is permanently incomplete.
- Converted lead
Meaning: the customer came from a converted lead. Where it appears: when the customer is connected to a My Page request. Next step: review the profile and create the next document or job. It does not mean: the customer has already accepted a quote.
7. If You Cannot Create the Customer
- Confirm the required First name field has a value.
- Check that the email uses a valid format.
- If the address is not ready, you can create the customer and complete it later if your process allows it.
- If you think the customer already exists, return to the list and search before creating another record.