

Before you start
- Know what you were trying to do in Impulso Pro.
- Include the related customer, job, quote, invoice, or screen when it applies.
- Do not share passwords, private codes, or banking details in the message.
- The send button only becomes available after you add a subject and details.
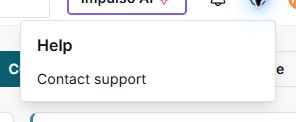
1. Open the Help menu
- From any main screen, go to the top right.
- Click Help.
- Choose Contact support.
2. Write the request
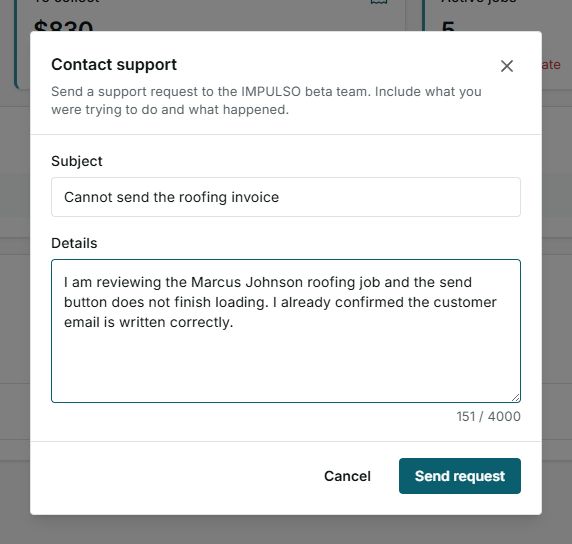
- In Subject, write a short phrase for the issue or question.
- In Details, explain what you did, what you expected to see, and what happened.
- Add relevant names or documents, for example a roofing invoice or a Marcus Johnson job.
- Review the message before sending it.
3. What to include for better help
- The related customer or job name.
- The action you were trying to complete, such as sending an invoice or opening a quote.
- The message you saw on the screen, if there was one.
- Whether the issue happens every time or only with one customer/document.
- What you already checked, such as the customer email or job date.
4. States and controls you may see
The verified screen shows subject, details, cancel, and send. Category and priority did not appear in this version.
- Send request disabled
Means: subject or details are missing. Next step: complete both fields. Does not mean: support is unavailable.
- Send request
Means: the form has the minimum information needed. Next step: press it only when the message is ready. Does not mean: the request was already sent.
- Sent
Means: your request was sent to the Impulso Pro team. Next step: wait for a reply or follow-up. Does not mean: the issue is already resolved.
- Error
Means: Impulso Pro could not send the request at that moment. Next step: check your connection and try again. Does not mean: you lost the information forever.
- Cancel
Means: closes the form without sending. Next step: use it if you are not ready to send the message. Does not mean: a draft request is saved for later.