

Before You Start
- Open an existing customer from Customers.
- Confirm which address should be used as the primary property.
- Have the street, suite or unit, city, state, and ZIP code ready.
- If you are only reviewing the screen, use Cancel to leave without saving changes.
1. Open the Customer Detail
- Go to Customers.
- Click the customer's name.
- Find the Properties section.
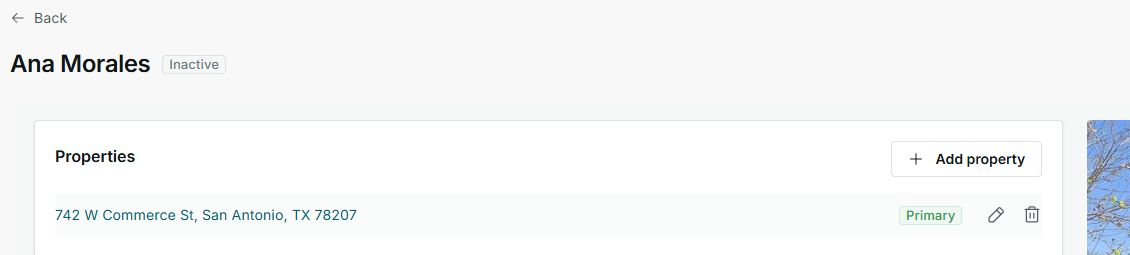
The property marked Primary is the main address your team should review before creating a job, quote, or invoice for that customer.
2. Review the Primary Address
- In Properties, review the address shown on the card.
- Look for the Primary badge.
- If the address is correct, you can keep using that customer on the next documents or jobs.
- If the address is not correct, use the pencil icon to edit it.
3. Add a Property
- Click Add property.
- Under Property type, choose the right category.
- Complete Address line 1, city, state, and ZIP code.
- Use Address line 2 for a suite, unit, or apartment when it applies.
- Click Save only when you want to keep the new property.
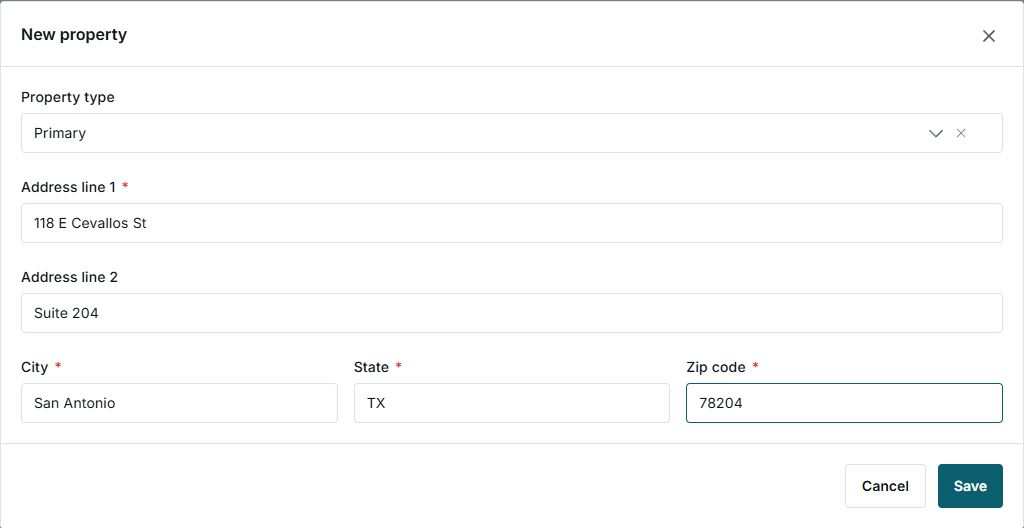
The form shows the required address fields and lets you cancel if you do not want to create a new property.
4. Edit an Existing Property
- On the property card, click the pencil icon.
- Review or change the property type and address.
- Click Save when the change is correct.
- Click Cancel to leave without changing the property.
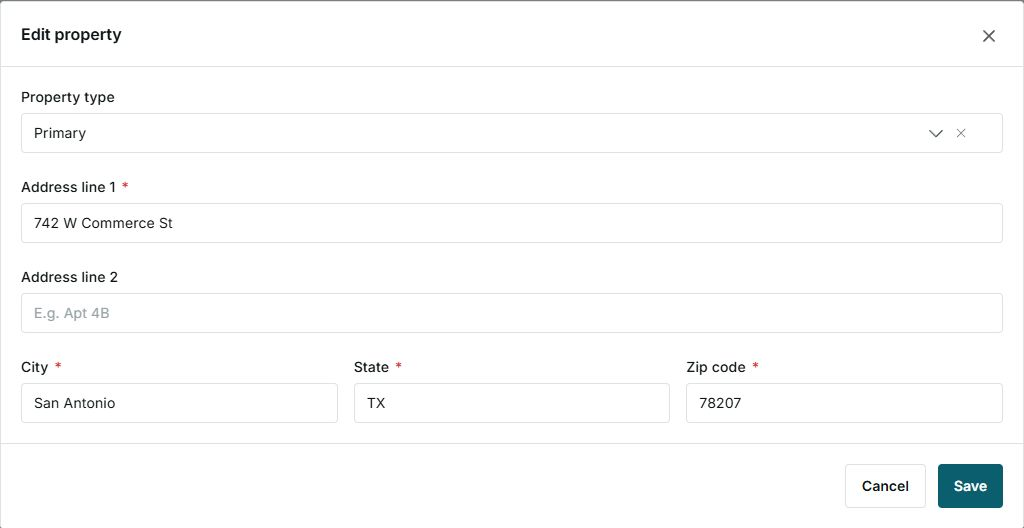
Editing a property changes the information your team sees when using that customer on a job, quote, invoice, or follow-up.
5. Use the Delete Icon Carefully
- The trash icon belongs to the property on that row.
- Before deleting, confirm your team no longer needs that address.
- If you only need to correct the street, city, state, or ZIP code, use the pencil icon instead of deleting.
- Do not delete a property if you still need it for a job, quote, invoice, or follow-up.
6. States and Controls You May See
These states help you understand the customer, their properties, and related activity.
- Inactive
Meaning: the customer is not currently marked as active. Where it appears: next to the customer name. Next step: check whether you should still use the customer for new work. It does not mean: the customer was deleted.
- Primary
Meaning: that property is the customer's main address. Where it appears: on the property card and in the Property type field. Next step: keep it current before creating documents or jobs. It does not mean: you cannot save other properties.
- Open
Meaning: related activity is not closed yet. Where it appears: in the Activity section. Next step: review open items before changing important details. It does not mean: every item needs urgent action.
- History
Meaning: shows earlier customer activity. Where it appears: next to Open. Next step: use it to review past work. It does not mean: work is pending.
- Draft
Meaning: the related quote has not been sent to the customer yet. Where it appears: in Activity when open quotes exist. Next step: open the quote if you need to review or send it. It does not mean: the property has a problem.
7. If You Do Not See the Expected Property
- Confirm you are on the correct customer.
- Check whether the property was saved under another address or suite.
- If a property is missing, use Add property.
- If the primary address is wrong, edit the property before creating new documents.